
Integrating with Magento
You can install any Magento Plugin by following the below steps. It is preferable (but not necessary) to have some technical knowledge related to SSH (or how to access your Magento hosting from your local computer).
Step-1 On Magento Marketplace
1. Open the Magento marketplace & login to your account.
2. Search for Influence plugin (or Click here)
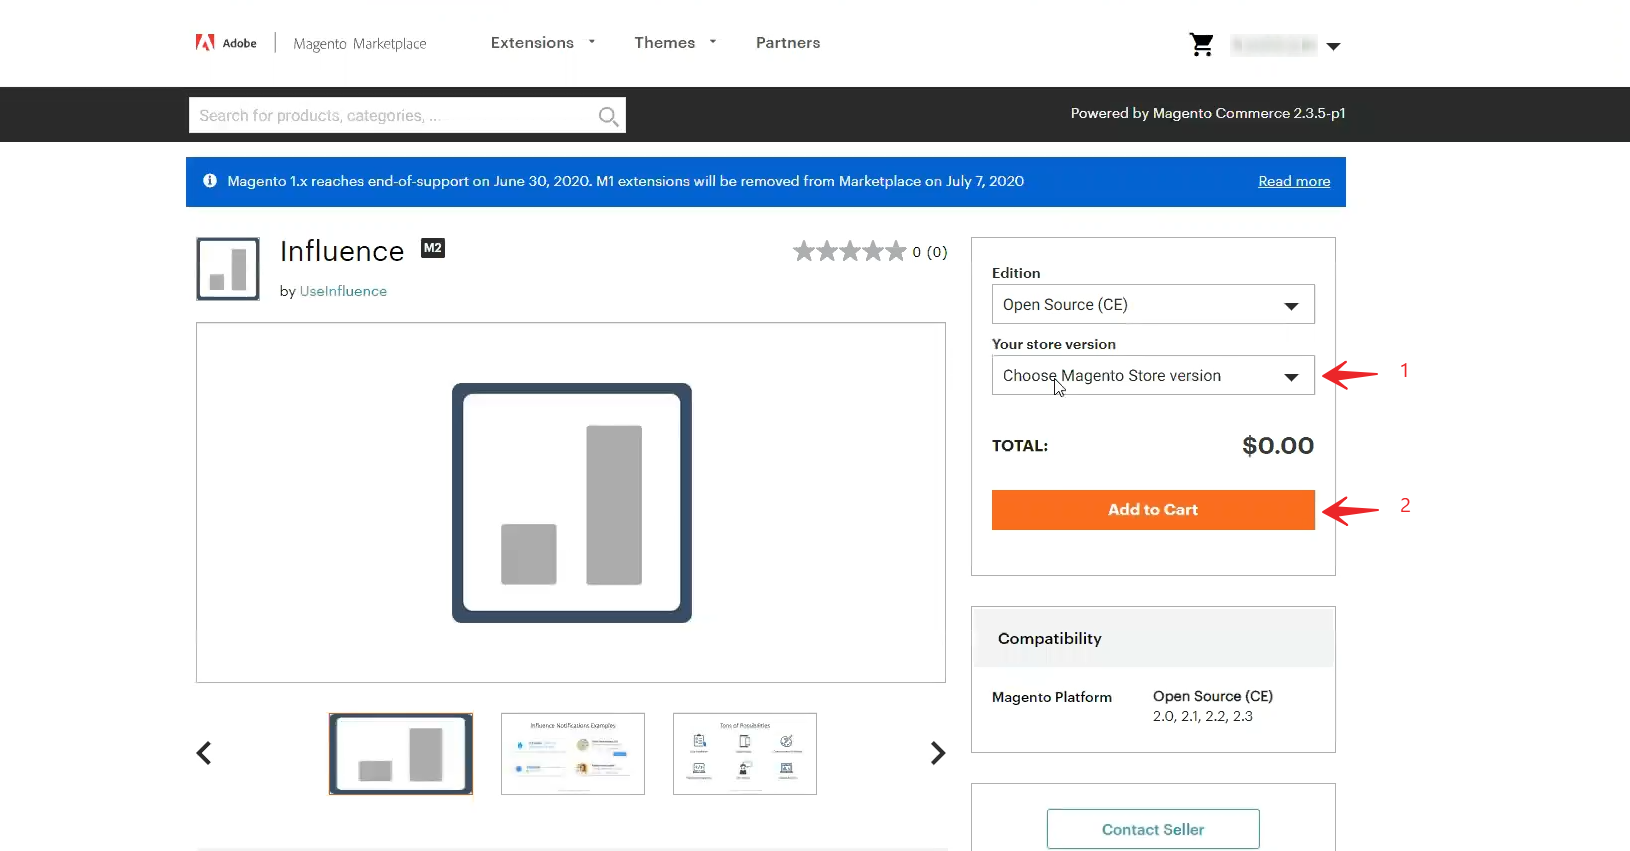
3. Select your store version from the dropdown & click on Add to Cart button (below pic),
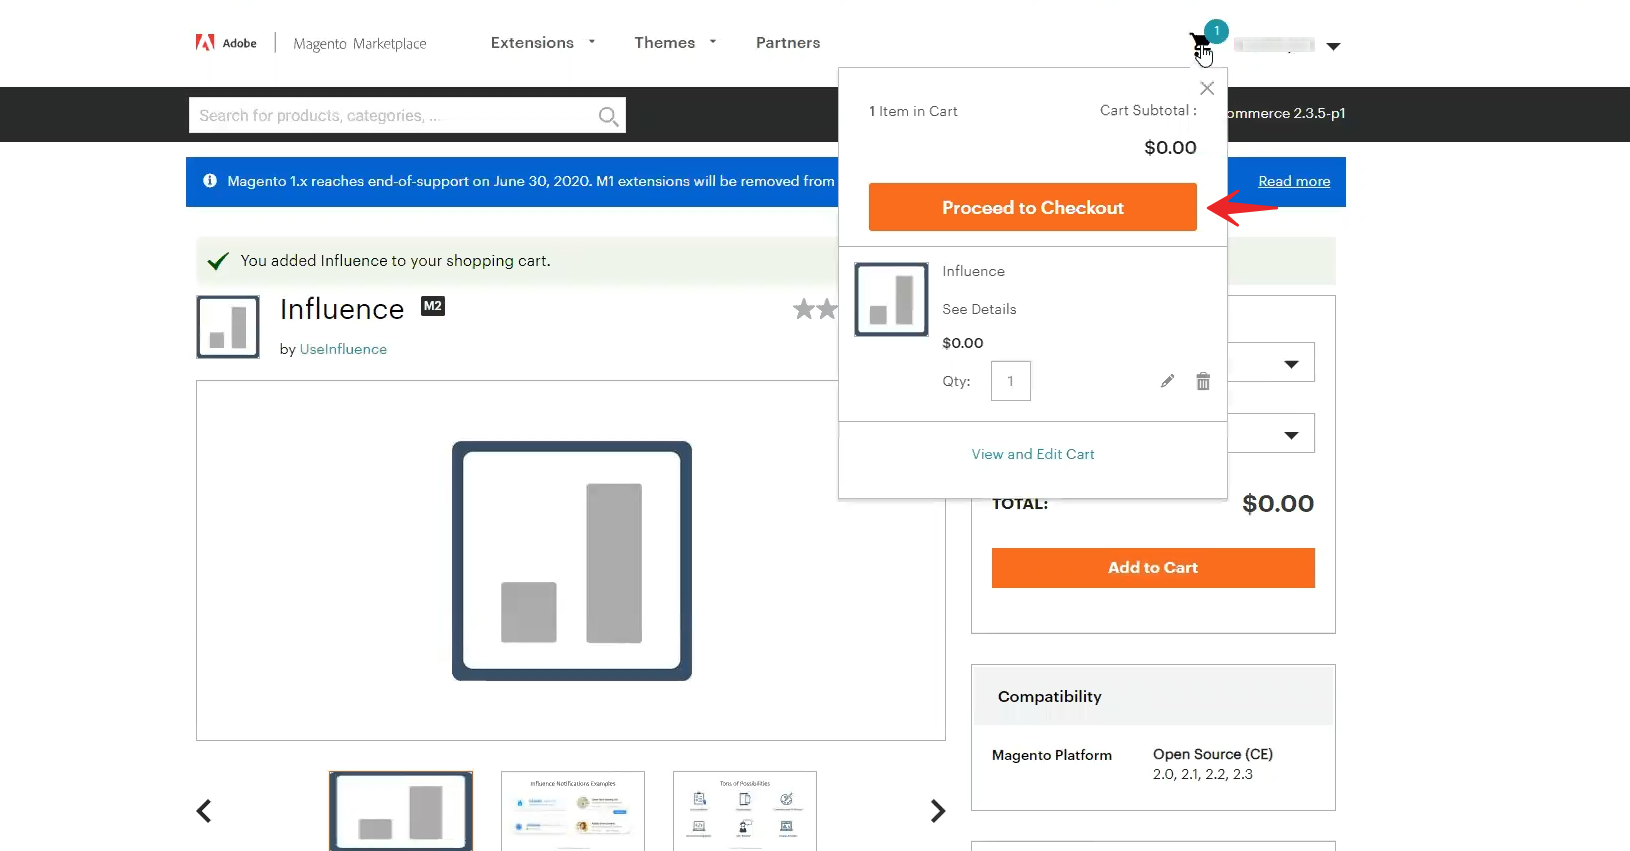
4. Click on Proceed to Checkout button & confirm the order (below pic),
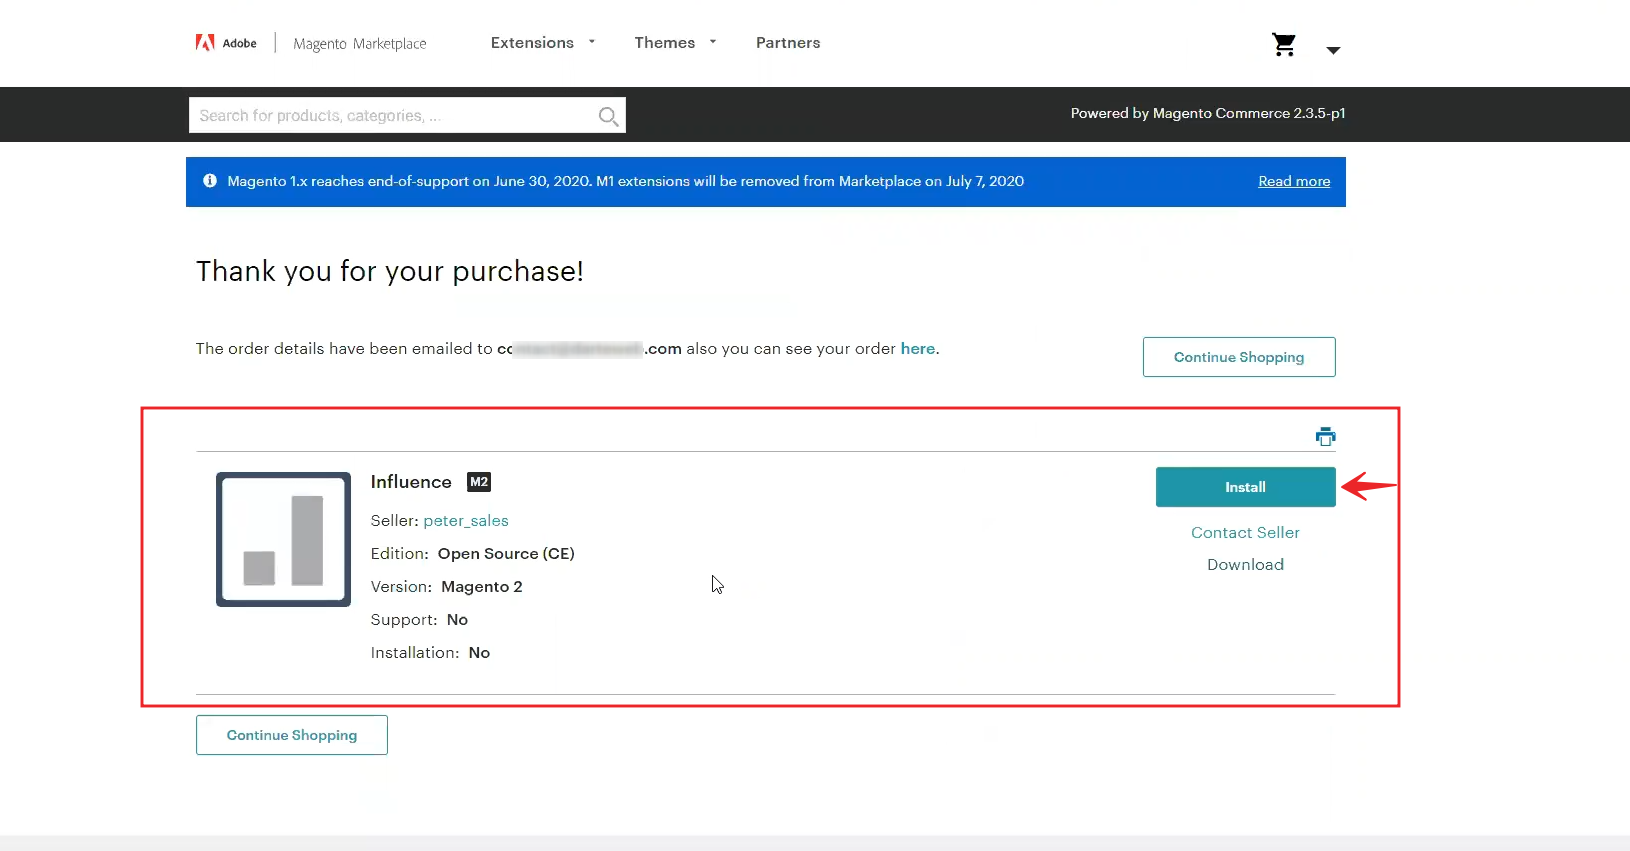
5. Click on Install button & you will be redirected to your Magento marketplace Access key page (below pic),
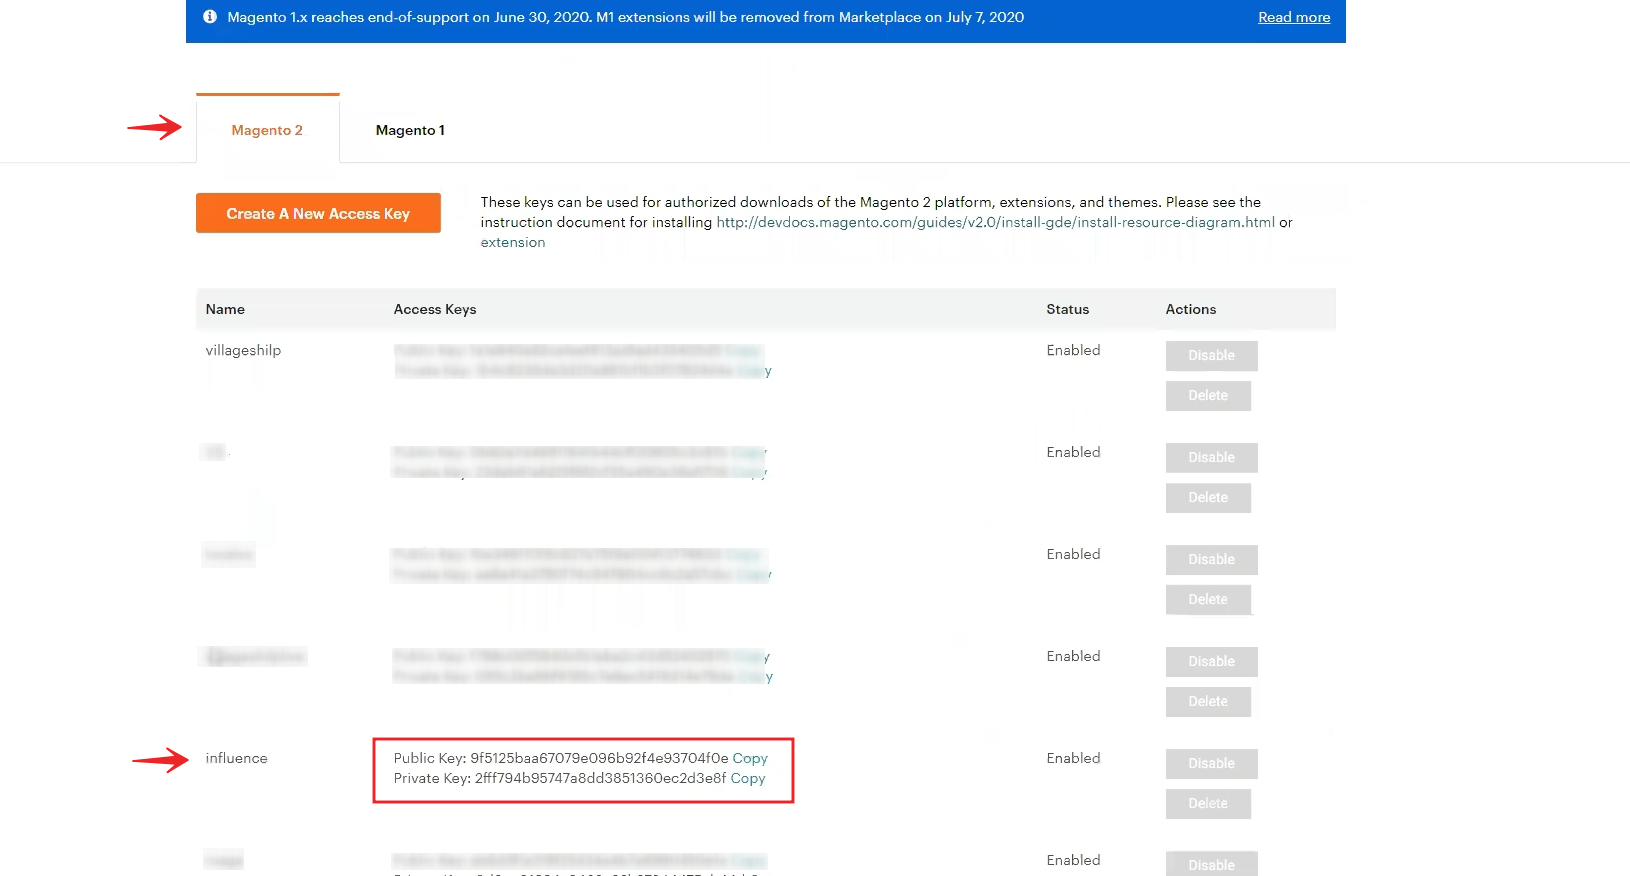
6. On the Access key page, you can create a new access key by clicking on the orange colored button. You can name it anything you want, for convenience, we have named our access key as "Influence". Copy Public key & Private key (below pic),
Step-2 Inside Magento Admin Dashboard
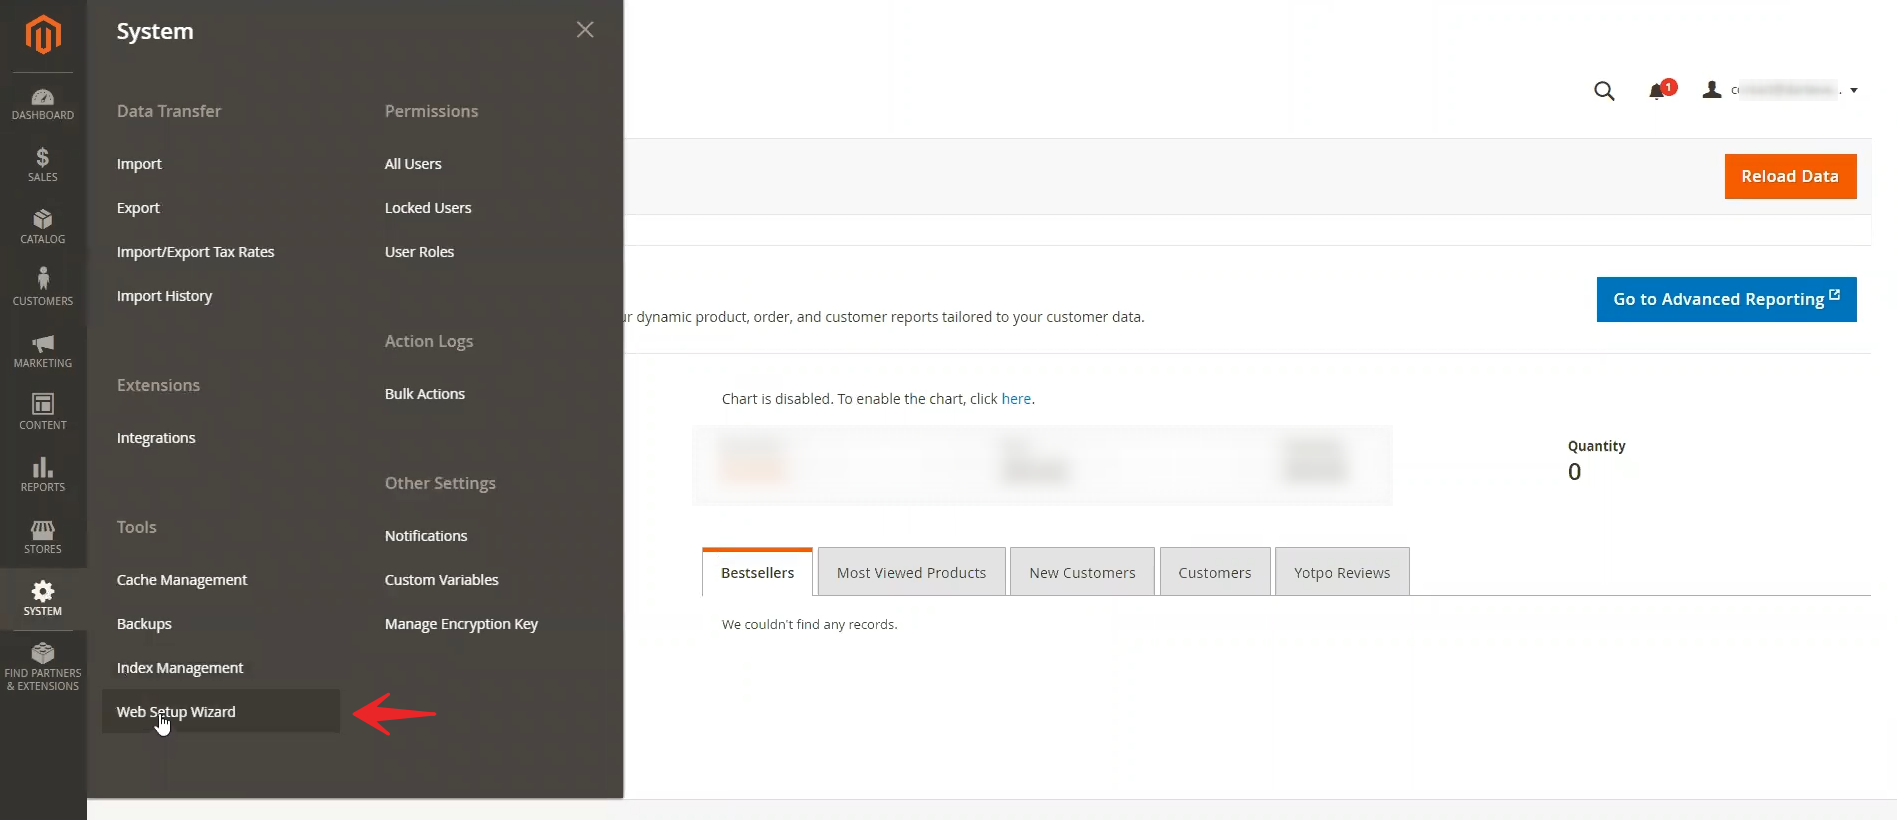
1. Click on System button on the sidebar & then click on Web Setup Wizard (below pic),
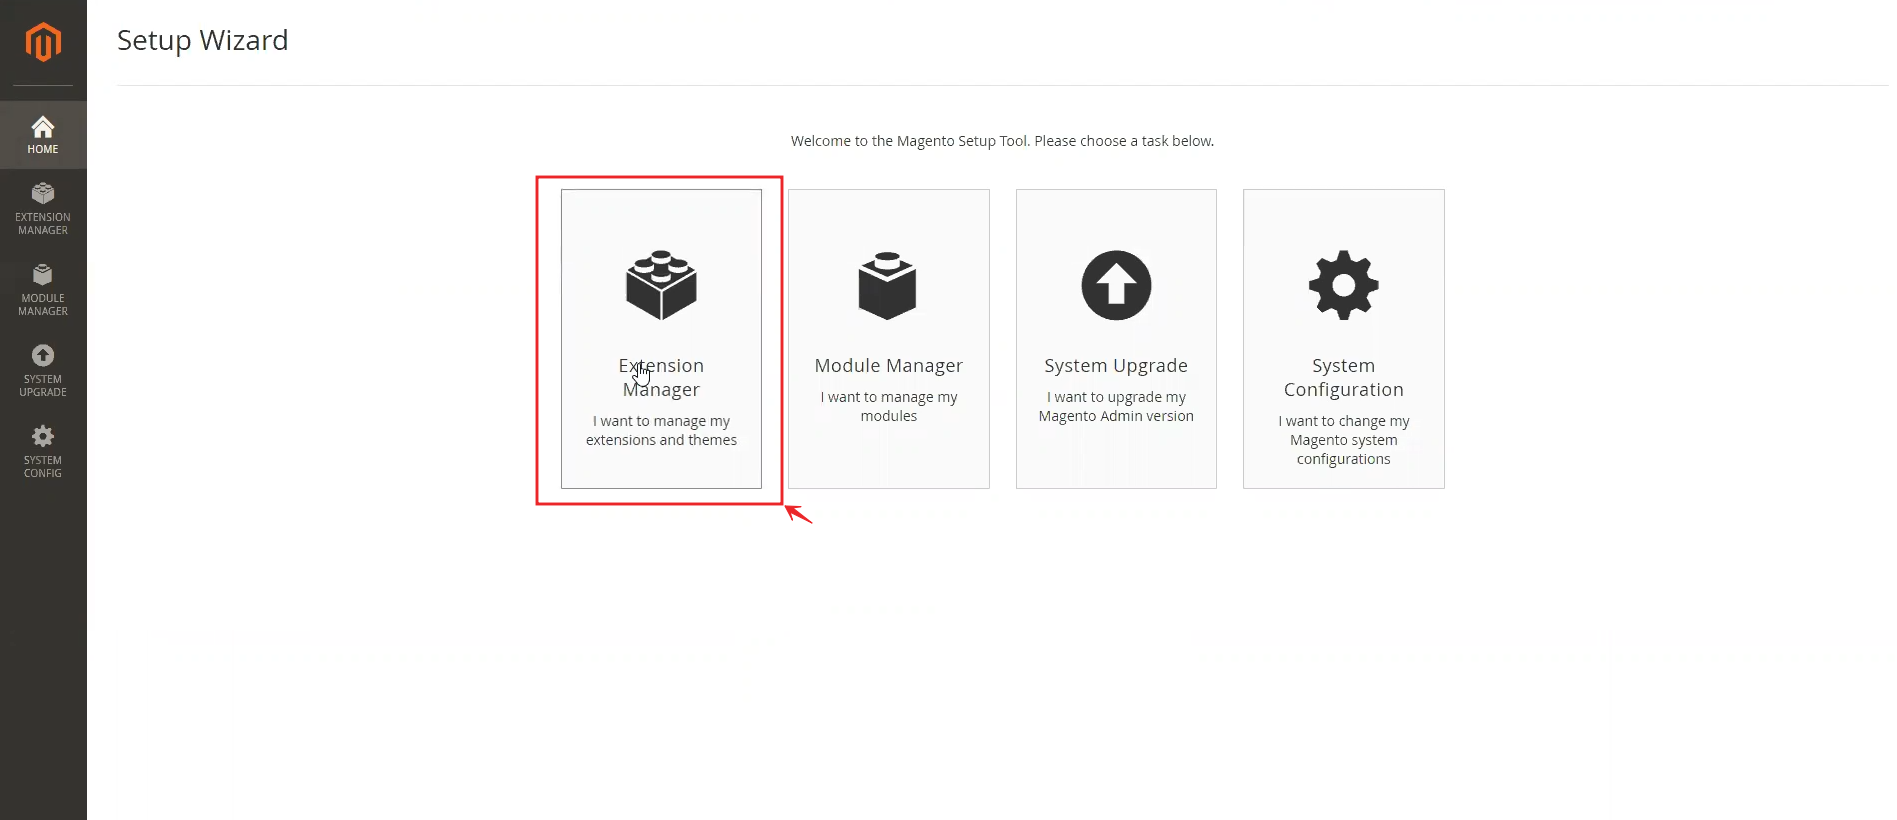
2. Click on Extension Manager tab (below pic),
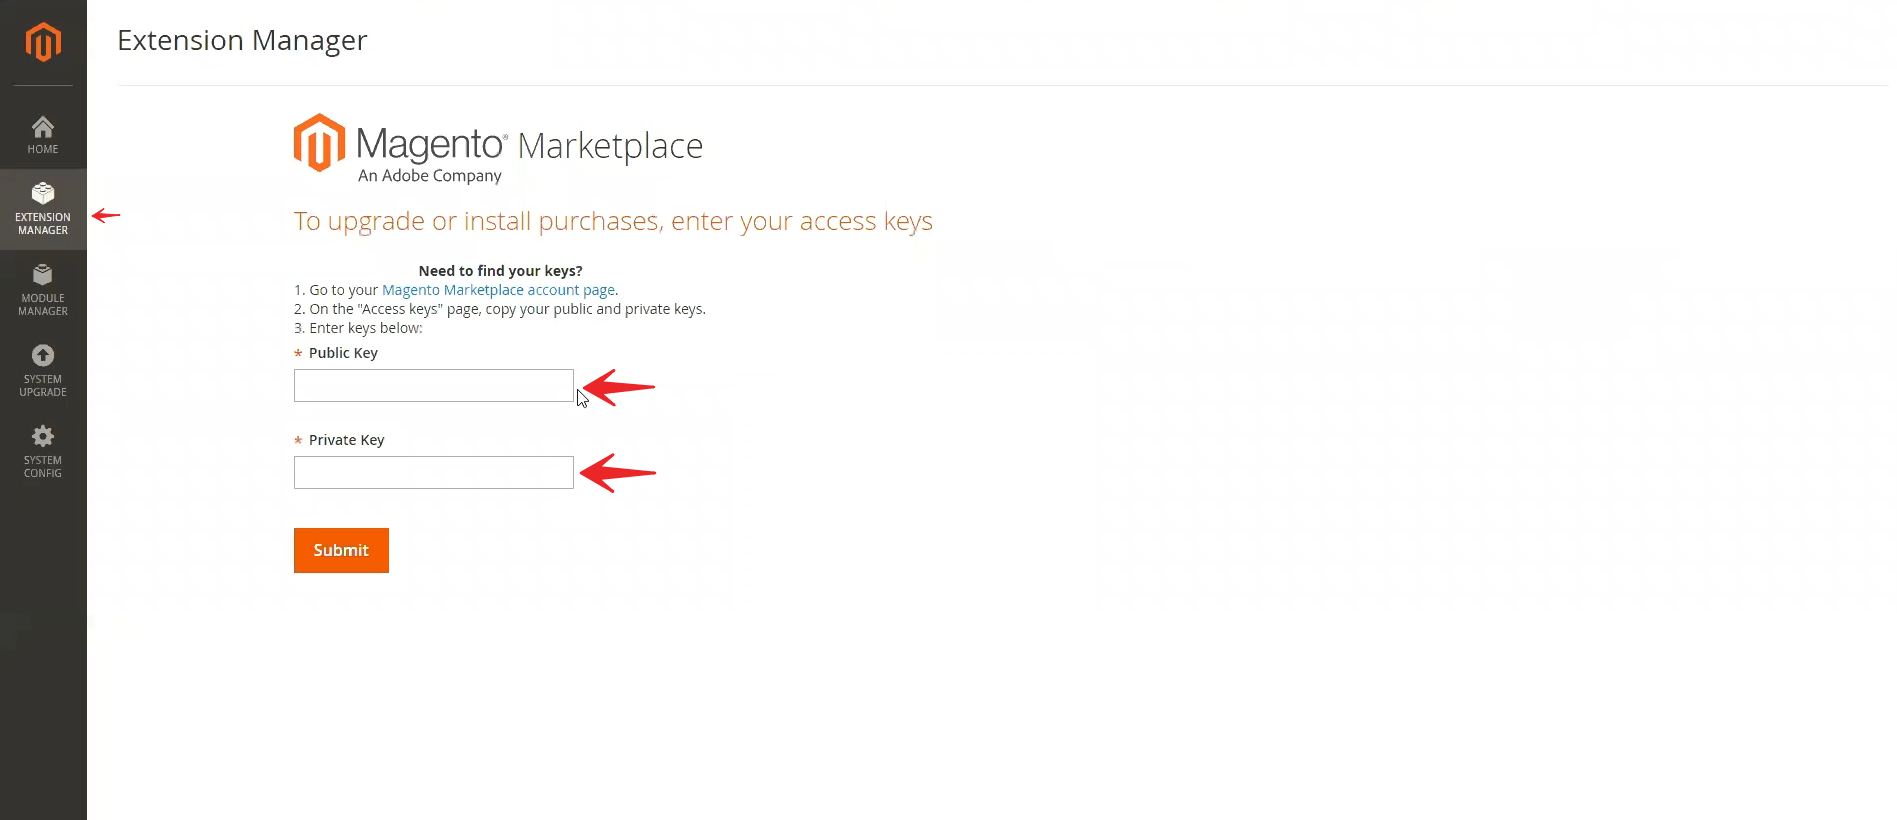
3. Paste the Public key & Private key, which you have copied in Step-1 (6), in their respective fields & click Submit (below pic),
Step-3 Activate Influence Plugin on Magento Server
You need to use SSH (Secure Shell) to access your Magento hosting server & activate Influence Plugin there.
There are many tools which can be used to access your Magento App Server, PuTTY is one of the most convenient tools to use as we have used in this tutorial.
You can download PuTTY from here.
Run PuTTY app on your computer & follow these simple steps to activate the plugin.
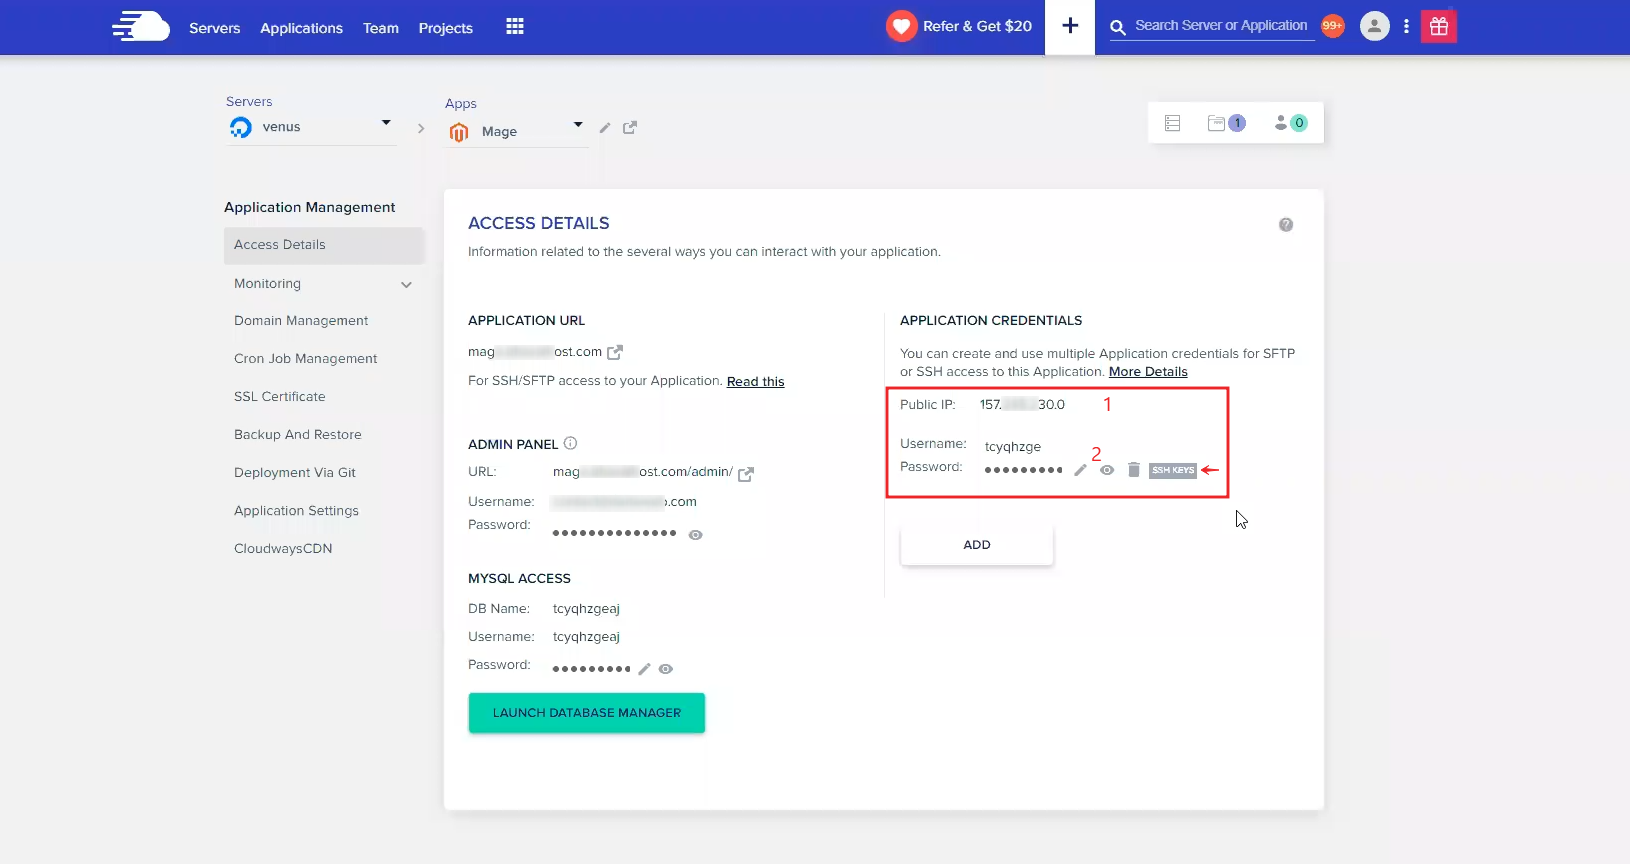
1. Open your Magento web hosting dashboard panel (as per the below pic). You will need "Public IP" (1) & "SSH Keys" (2) for the next steps,
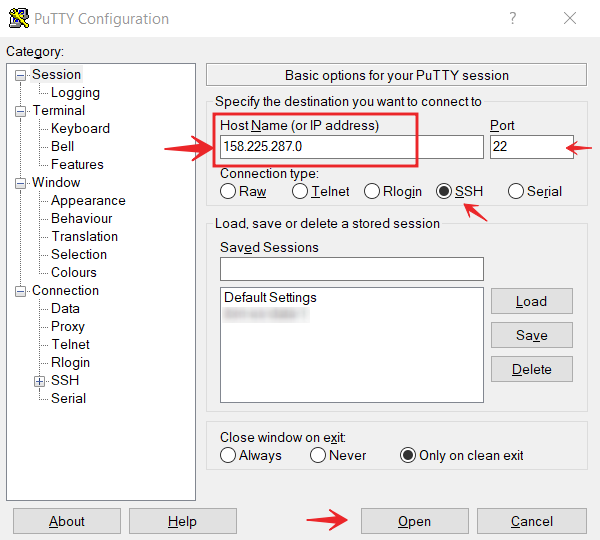
2. In PuTTY application, paste your Public IP in the Host Name field & click on Open button (refer below pic),
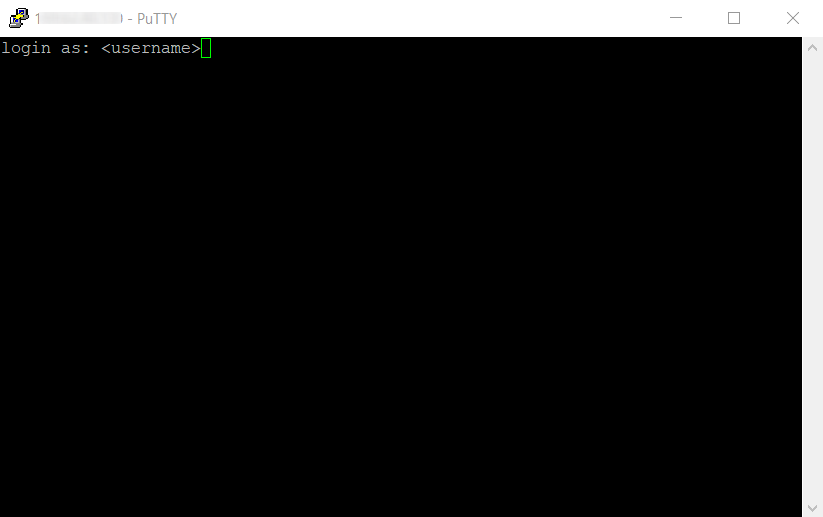
3. After you are finished with the above step, PuTTY command line panel will open where you have to insert your SSH Keys (Username & Password) for authentication & it will then connect directly to your Magento server (as below pic)
{Note: While entering the password PuTTY will not display it due to security reasons}
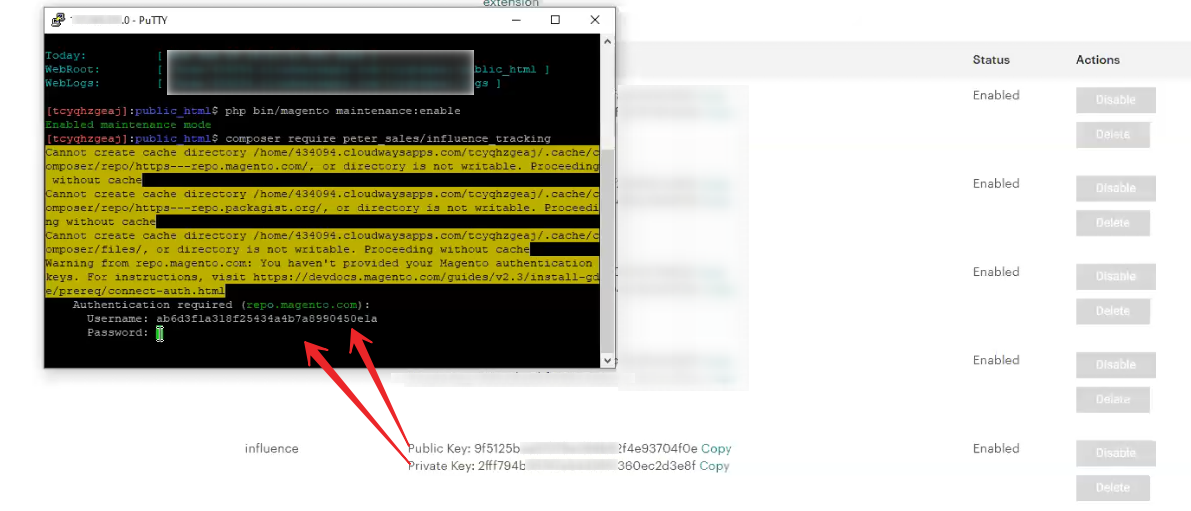
4. After successful authentication in the above step, run the following Commands one-by-one to complete the Plugin Activation (commands are highlighted in bold):
- php bin/magento maintenance:enable
- composer require peter_sales/influence_tracking {After running this command Username & Password fields will appear again, and here you need to insert Public & Private key from the Marketplace Access Key page. This might happen 2-3 times during the installation}, {System will ask "Do you want to store credentials", you need to write Y & press enter}
- php bin/magento setup:upgrade
- php bin/magento setup:di:compile
- php bin/magento cache:clean
- php bin/magento maintenance:disable
Step-4 Activate Influence Tracking
After successfully activating the Influence Plugin in the previous step you will need to activate the tracking from your Magento Admin Dashboard. Follow these steps to get it done,
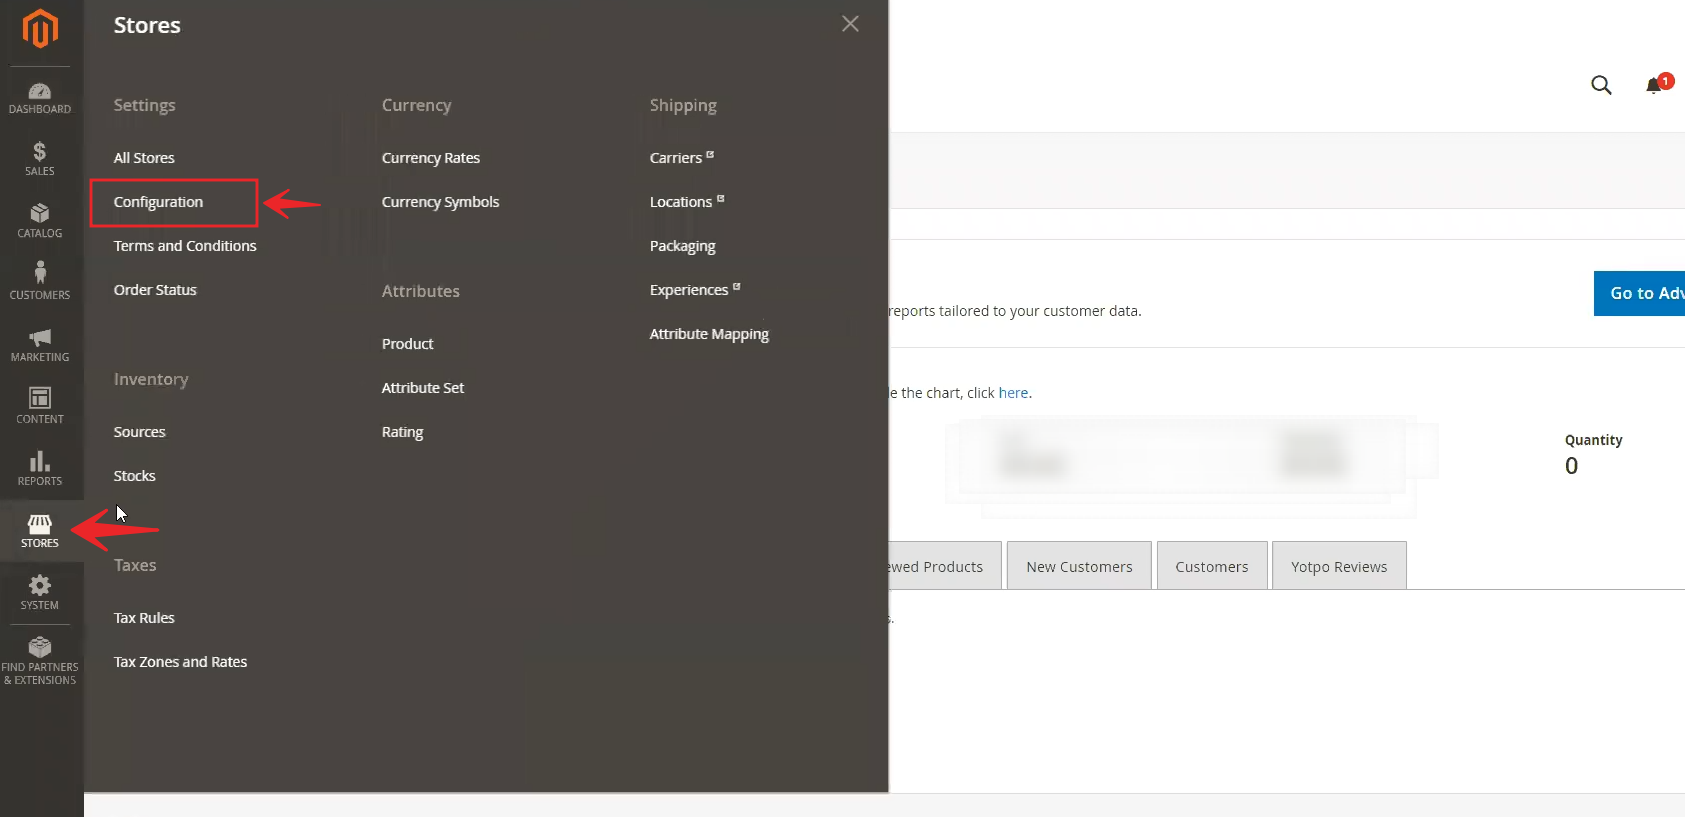
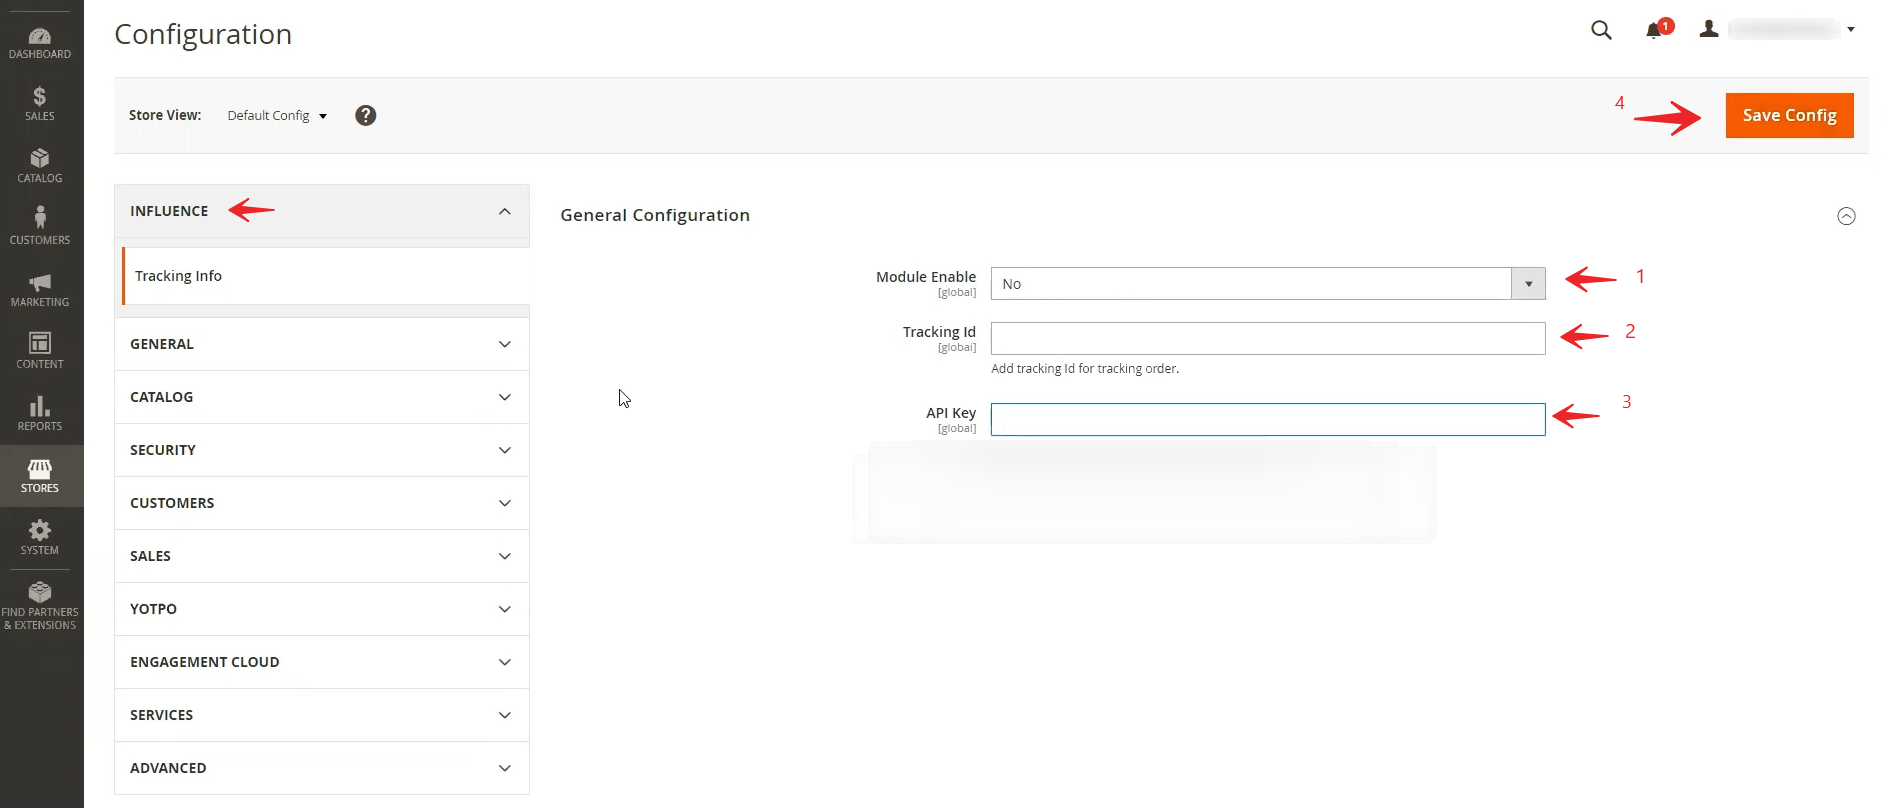
1. Click on Stores button & then click on Configuration (refer below pic),
2. On the Configuration page, click on Influence & input your tracking information as per below steps,
- Module Enable - Select Yes
- Tracking Id - get it from your Influence dashboard (Click here)
- API Key - get it from your Influence dashboard (Click here)
- Finally, Click on the Save Config button on the top right corner.
Congrats! After completing all the above steps you have successfully installed Influence Magento Plugin on your Magento application/website.
What to do next? You can make a campaign inside the Influence dashboard & check your Pixel status which should have turned green (i.e. active).
Contact our helpdesk if you are facing any problem during the installation.