
Integrating with Stripe
Integrating with Stripe is an easy task, once done. You'd be able to display real-time social proof in an automated format and convert customers easily.
(Note: Stripe doesn't give location data so you won't be able to show map locations. Since payment platforms are very strict they don't like to get into data sharing and location sharing)
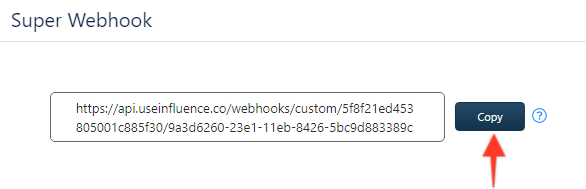
Step 1. Generate a unique Stripe Webhook URL.
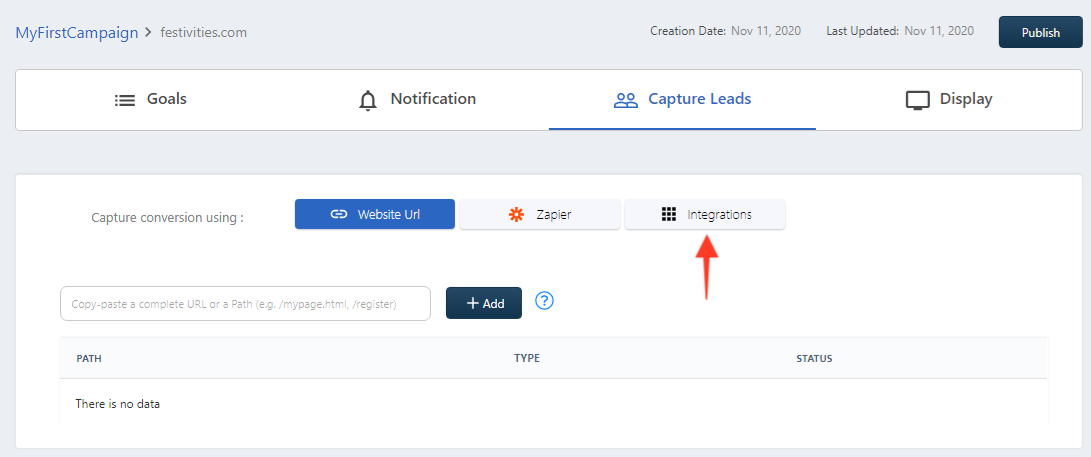
Go to your Campaign's Capture Page.
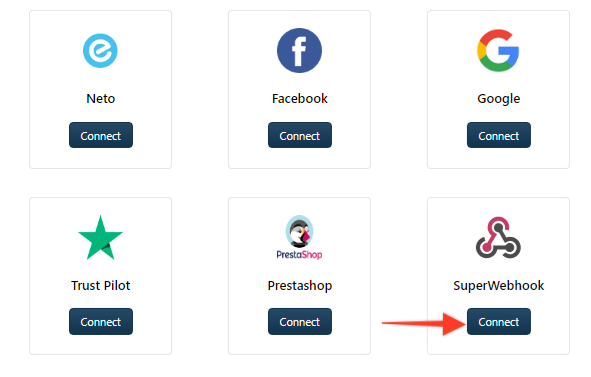
Go to the Integrations tab, and then click on SuperWebhook, and click on the Connect button.
The following window will open. Copy the Webhook.
Step 2. Installing the Endpoint in Stripe.
Inside your Stripe account, Go to Webhooks page under Developers section, and Click on +Add endpoint button,

A modal will open, fill out the details as shown below.
- URL to be called - Paste the URL endpoint which was copied earlier.
- Filter event - Check the 'Select types to send' & select options as 'customer.created' (or 'customer.subscription.created' or 'person.created').
Click on Add endpoint button & you are done!

Newly created endpoint will be displayed as shown below.

Do some tests by inserting the dummy data & observe it being displayed inside your Influence dashboard.
After successful integration, you can now directly receive new customers/order data inside your Influence Campaign, and show them as Recent Activity Notifications.
If you're still facing any issues, then you can contact us through the support section, & we'd be more than happy to assist you with it.