
Getting started with White-Label
White-Label feature gives you the power to re-brand Influence product & resell it under your own banner.
Here are the things you have to do:
Step 1. Re-branding
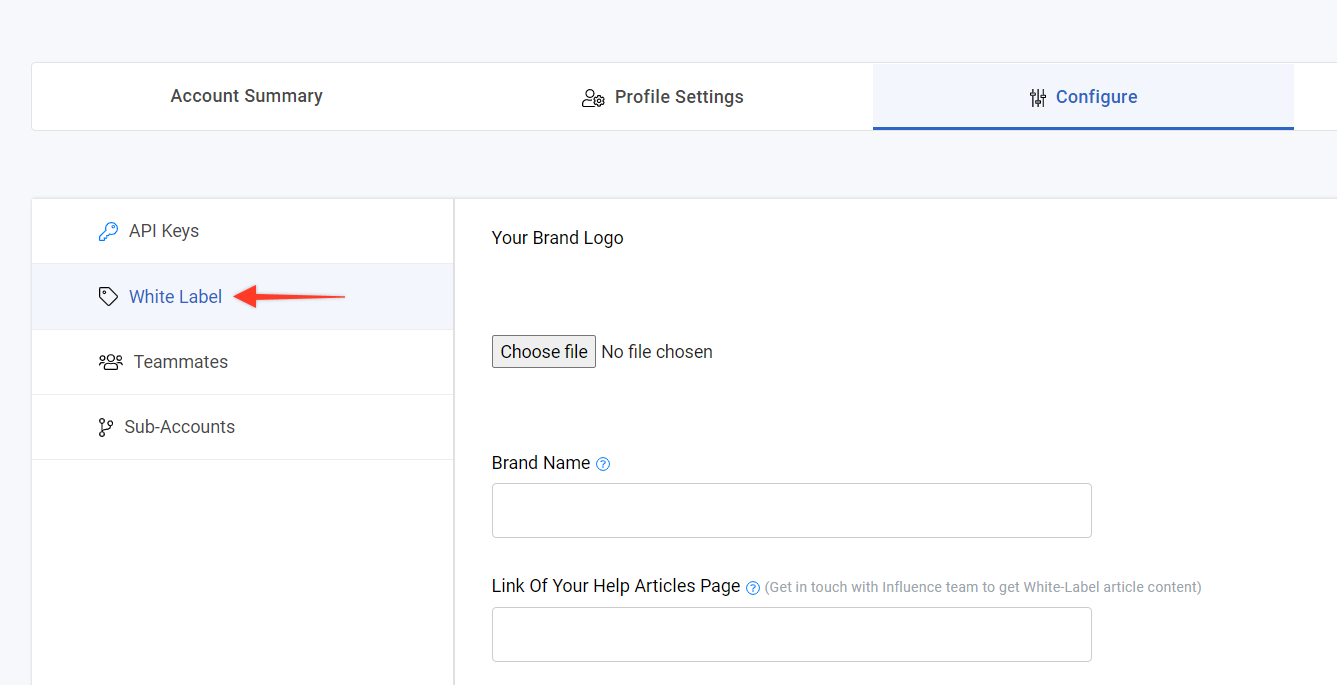
Go to your Configure page available under the Settings tab from the left hand panel.
Click on White Label tab, fill out the fields as per your requirement -
- Upload your brand logo - this will replace all the Influence brand icons, even favicon
- Fill in your brand name - this will replace Influence name everywhere
- Fill in the complete Url of the page were you will host your Help Articles to redirect your sub-users on them. Leave it empty if you don't want to.
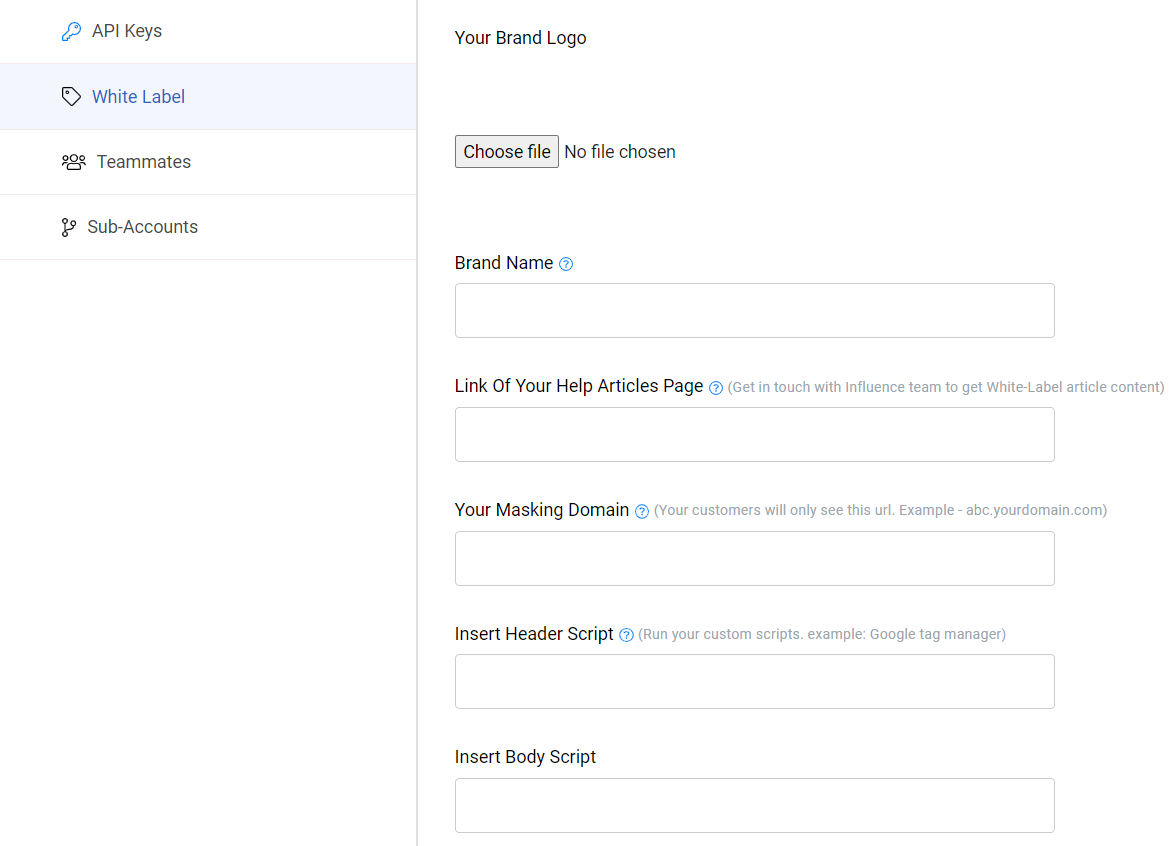
Inserting custom scripts will help you in installing your own 'Widgets' or 'Google Tag Manager' scripts on your WhiteLabel dashboard pages.
- Insert Header Script - Insert your custom scripts here & this will go inside the <head> tags of your whitelabel dashboard.
- Insert Body Script - This script goes inside the <body> tags of your whitelabel dashboard.
- Insert your Domain Url which you want to reflect to your sub-users, for example: if you own a domain named 'yourdomain.com' then add any custom text to it which you want, like 'custom.yourdomain.com'. Remember the same text will have to be updated in your domain DNS records.
Step 2. Updating DNS records
Once you are done with the above step, you have to update the DNS records inside your domain name management dashboard.
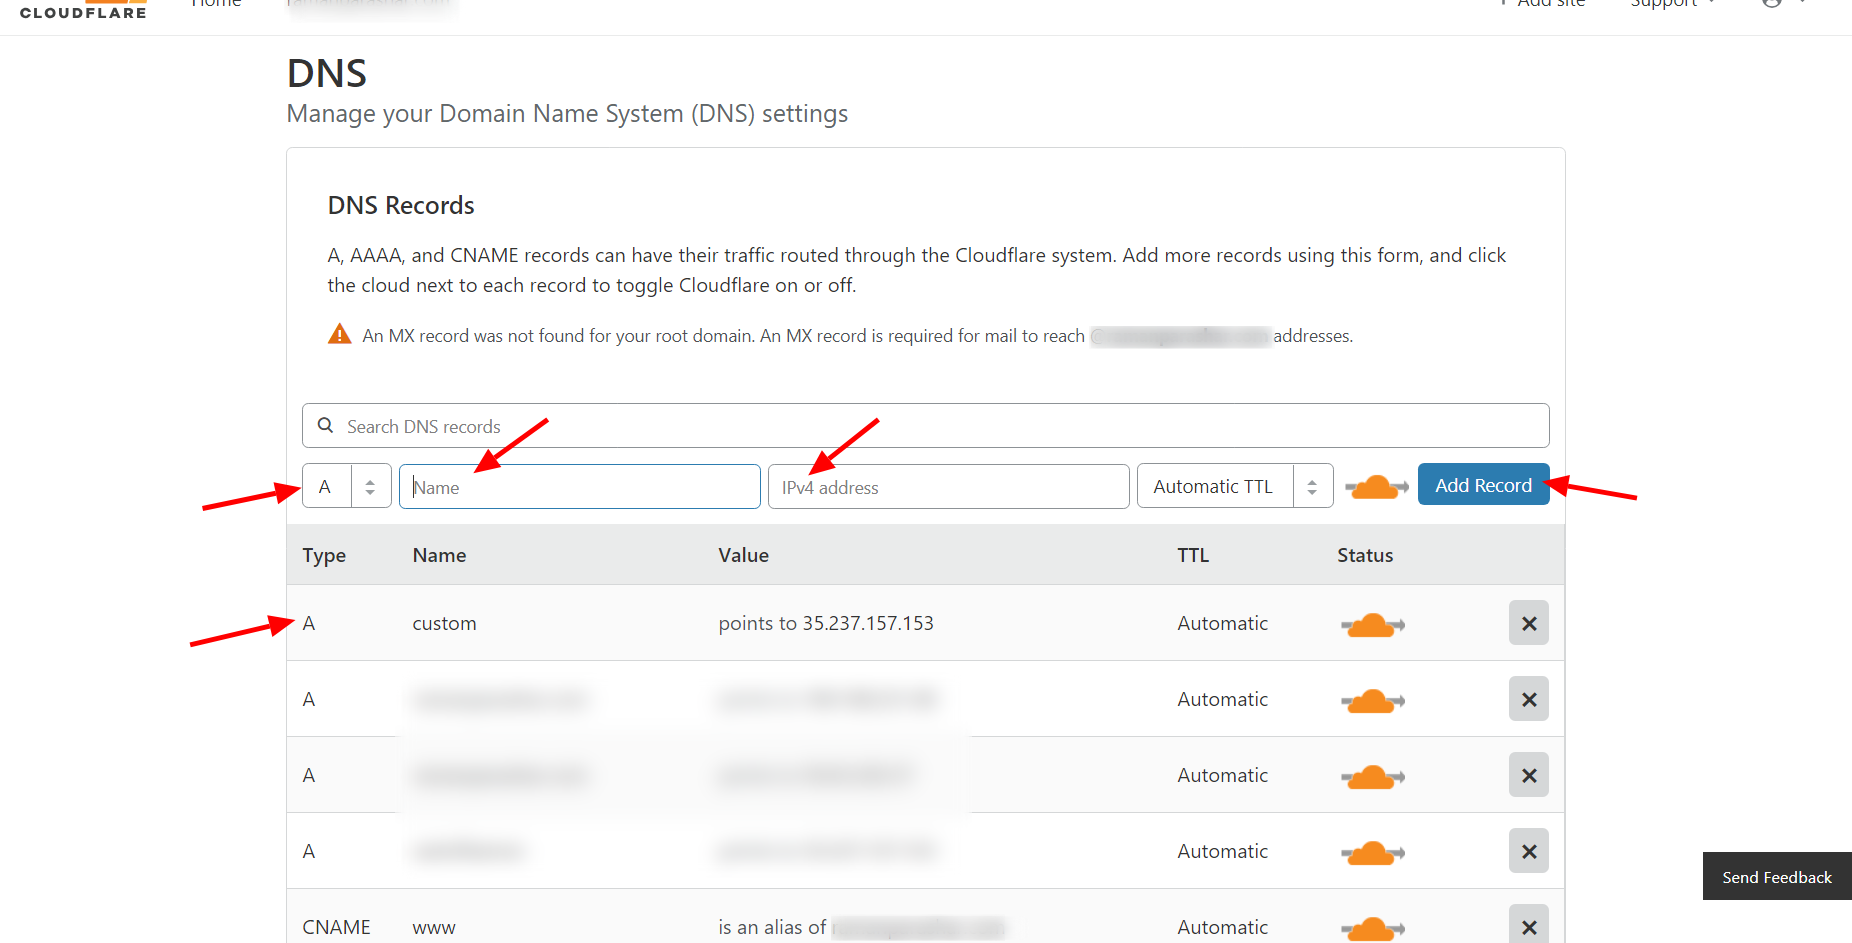
Inside your DNS settings area, you have to add a new record.
- Select type of record as 'A'
- If your masking domain looks like 'custom.yourdomain.com', then you have to insert custom in name field
- In IPv4 address field, insert 169.47.180.43
- Click on Add Record & see a new record being created, as shown below.
After completing the above step, your Unique Url (custom.yourdomain.com) will be activated & it will show re-branded Influence to your customers.
Step 3. Adding Sub-User/Customer Accounts
You have to manually add sub-user accounts from inside your dashboard.

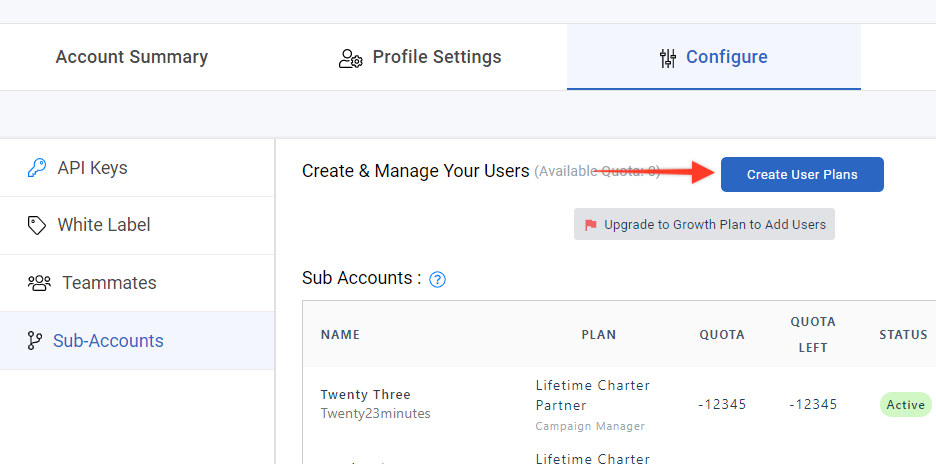
Before adding any sub-user you need to create plans (user limits) so that you can assign your sub-user various plans.
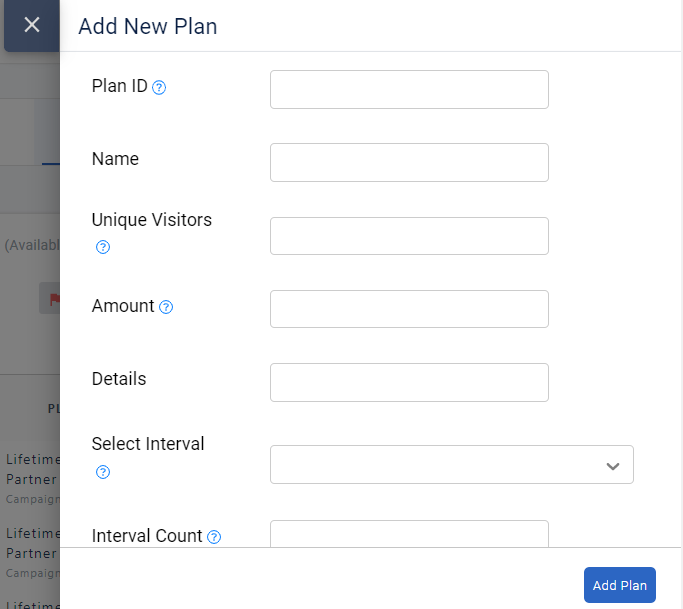
Click on the Create User Plans button :
While creating plans you can determine the following :
- Unique Visitors : The number of unique visitors that you want to allot under every plan.
- Amount : The price of the plan.
- Select Interval : You want the plant to be Monthly or Yearly
- Interval Count : In this field you can choose how many month or year after which the plan subscription will be renewed.
Once you have created the user plans, you can continue with creating sub-account
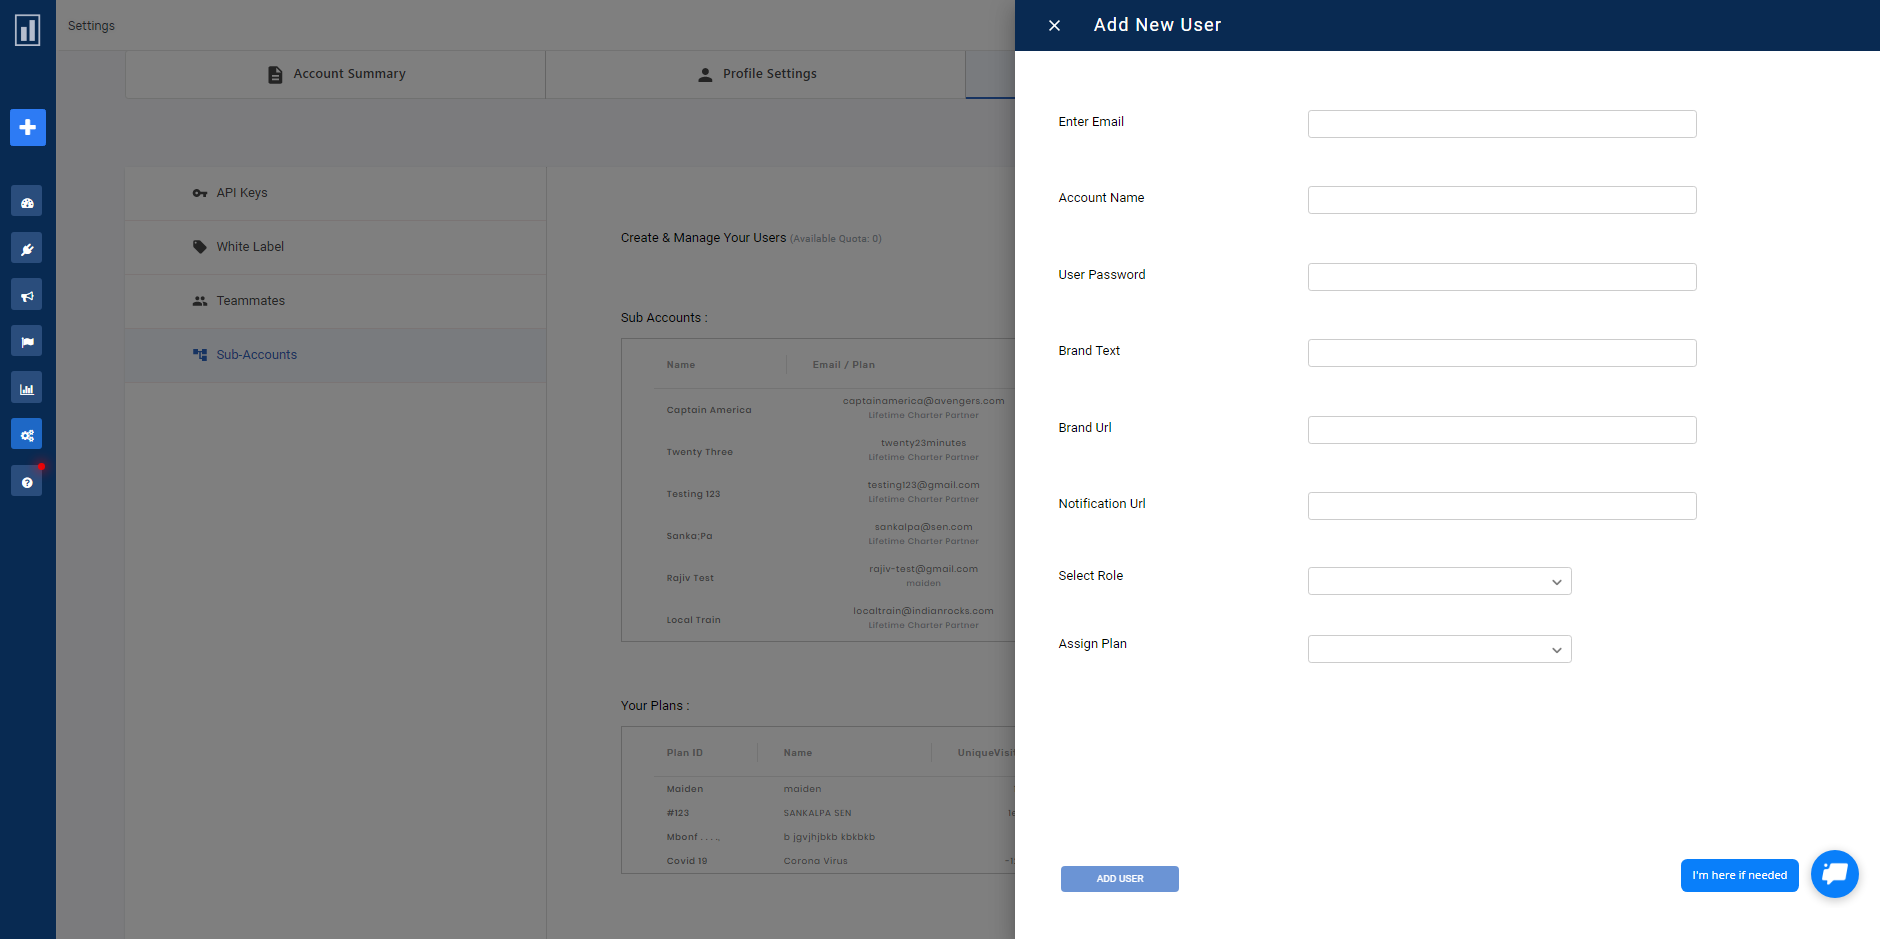
Here are the steps to add a sub-account:
- Click on Add Users button
- Fill in the user's email, name & any password
- Choose role as 'Editor', & module as Campaign Manager {important}
- Optionally, you can also assign an existing campaign to that user
- Click on Add Member
Finally, you can share the Login Credentials & Rebranded Url link to your newly added sub-user.
Repeat Step-3 to add multiple sub-users.
Still getting stuck? Ping us anytime, we are more than happy to help you with the installation.