Integrating with Joomla
Learn to install Influence on your Joomla website
Integrating Influence with Joomla takes less than 2 minutes.
Just follow the below steps to get it done quickly!
Step 1 - Create a Shack Analytics tracking tag
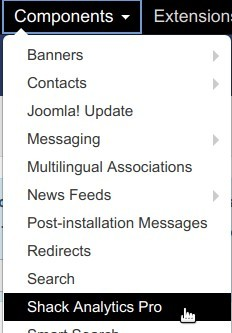
- In your Joomla administrator panel, go to Components > Shack Analytics Pro:
- You will be taken to the Shack Analytics: Tracking Tags administrative page. In the top left corner, click New:
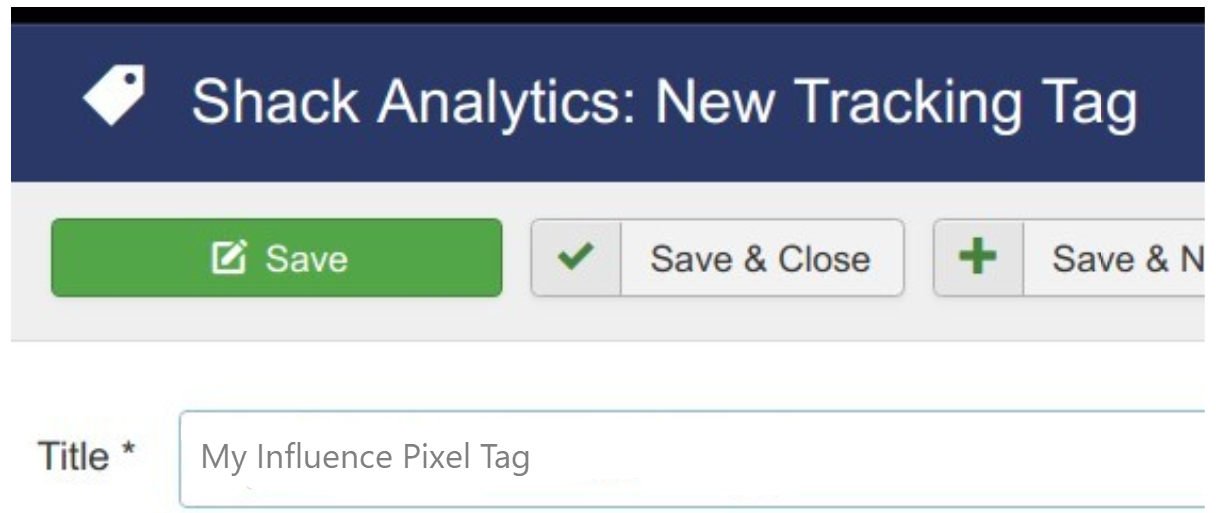
- You will see the Shack Analytics: New Tracking Tag page.
- Add your tag title. For the purpose of this tutorial, I called my tag "My Influence Pixel Tag":
- Locate the Header Custom Code parameter. Paste in its box the Influence Pixel:
- Click Save & Close.
In the next step, you will add this tracking tag either to your whole Joomla site or to a required Joomla menu or to a required Joomla article.
Step 2 - Add Pixel To the whole Joomla site globally
- Still on the Shack Analytics: Tracking Tags page, click on the Options button located in the top right corner of the page:
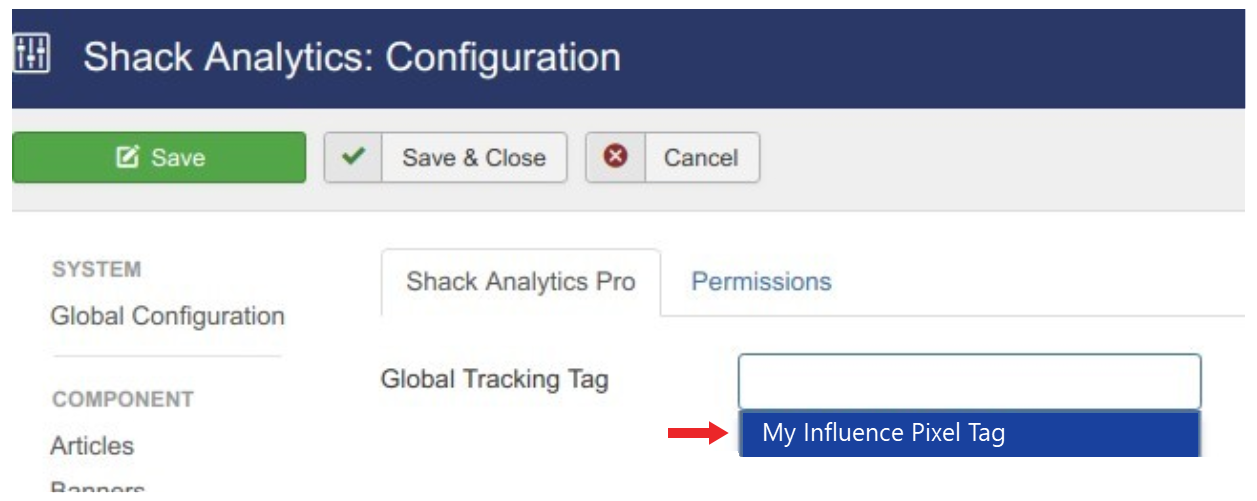
- You will be taken to the Shack Analytics: Configuration page. Under the Shack Analytics Pro tab, click inside the Global Tracking Tag and then on your tracking tag:
- Click Save & Close.
- Visit your Joomla site frontend and check its HTML source code. You should see the Influence Pixel code added into the header of its various pages:
Step 3: Verify your pixel.
To ensure that things are setup properly. Please verify your influence pixel in your dashboard.
Click here to learn how to verify your Influence pixel
Once you are done with the Pixel installation, go to your Influence dashboard & make a new campaign to get your pixel code verified.
If you're still facing any issues, then you can contact us through the support section, & we'd be more than happy to assist you with it.


