
Step 2: Setup a New Campaign
Set the styling & configurations, and run your notifications.
Once you are done with your installation step, the next step is to setup a campaign.
(Note: If you have skipped the first step, then this will not work, so please make sure you complete the first step. Click here to complete the first step)
Setting up a campaign is also an easy task. All it takes is a 4 step process to get it up and running.
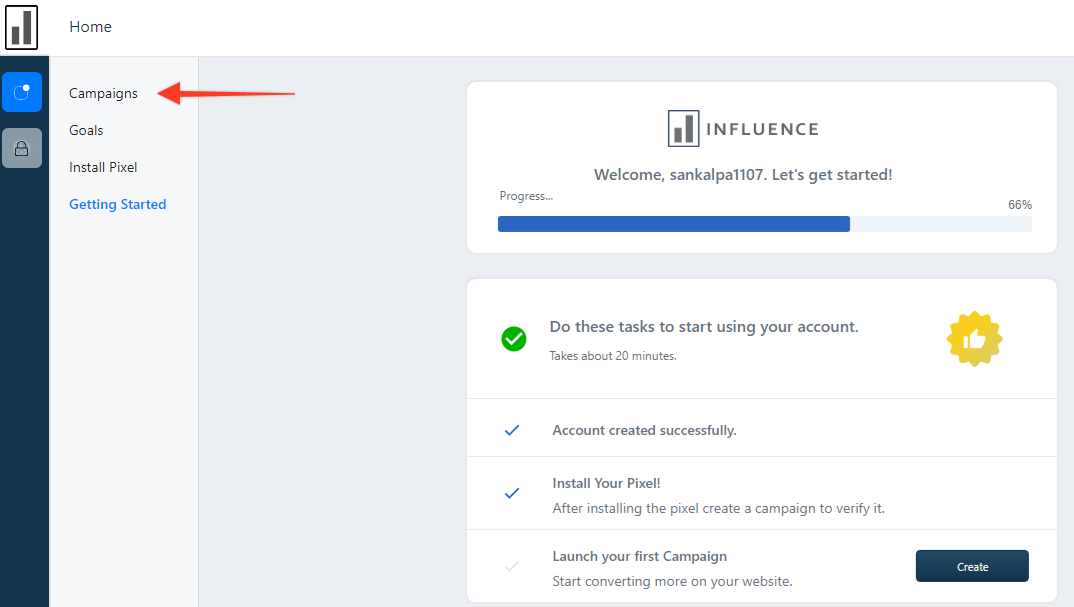
To do that first you'll have to go to the and click on the Campaigns on the left side of the dashboard.
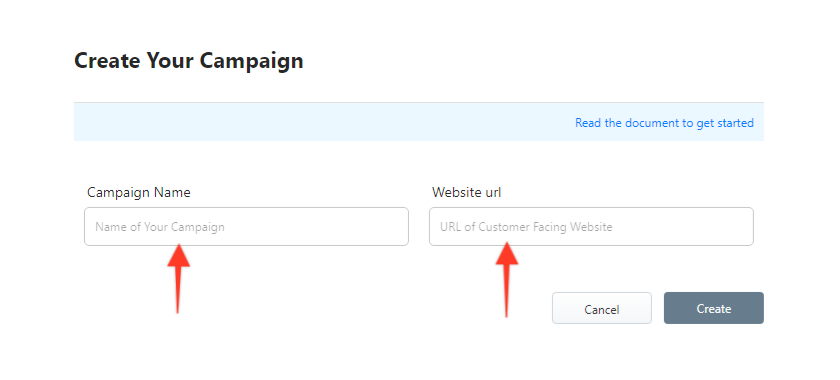
Once that is done, you'll see a pop up show up like this, where you'll have to fill in your campaign name and domain name depending on where you want to show the notifications.
Once that is done, you'll be shown a new 4 step process of creating a campaign where you will have to configure things as per your requirements and needs.
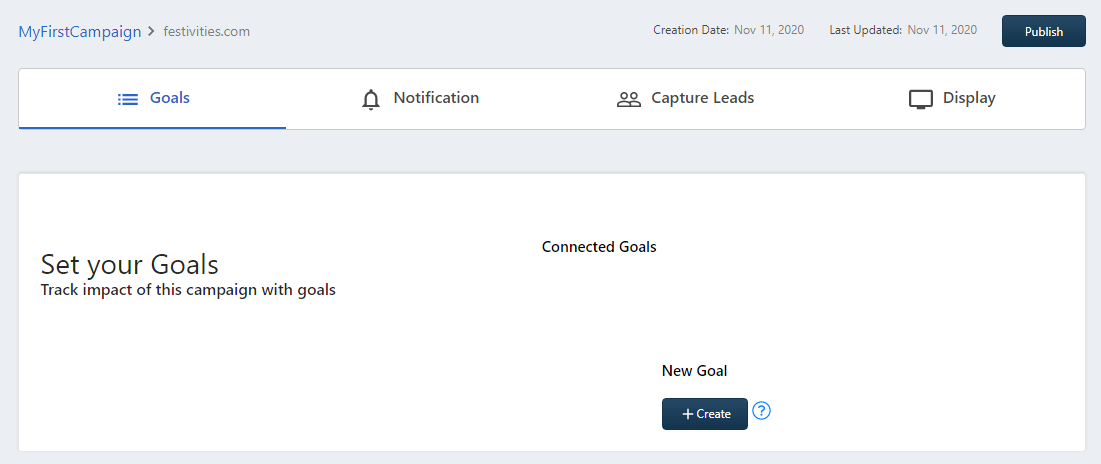
1. Goals :
The first step to getting started on creating a campaign is by creating your first goal for the campaign. Using this feature you'd actually be able to measure the ROI of the campaign that you're running on your website. You can set a number of goals for a single campaign and track the user's behaviors with the statistics that you get.
We'd recommend you to get started by creating ONE goal for the campaign to start with the then take things forward.
Click here to learn more about Goals & how to set up goals for your campaigns.
2. Notifications:
The second step is to configure Notifications as per your own requirement. Although after hours and hours of working with our customers we have set up the best configurations as default in the relevant sections. So you can even make it work by letting them to default settings.
You can click on the customize button of each of the notifications card to learn more and set up the notifications to make it work best for your case.
a) Manage Notifications
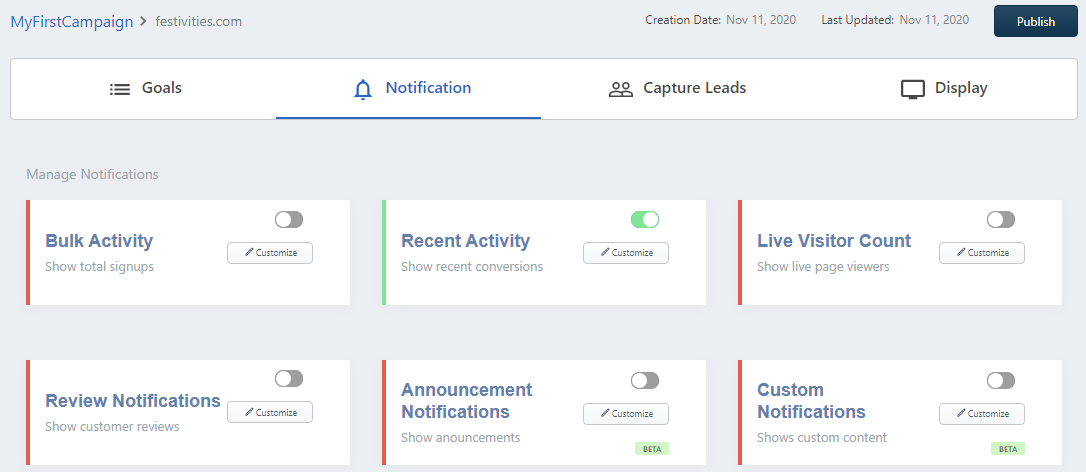
If you see this area, you can switch on and off to these notifications and decide which ones you want to keep active and which ones you want to shut down. Also, you can click on the customize button and see the settings that work the best for you.
Once this is done then you can click on the Publish button and move on to the next.
Currently we are having the following types of notifications available to be displayed on the websites.
b) Advanced Settings:
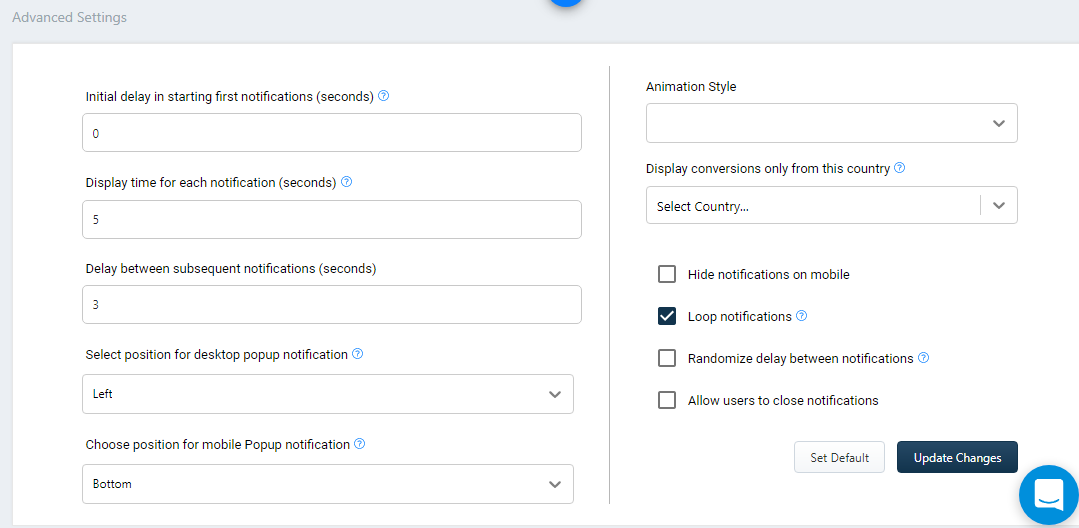
Now if you see the settings area, you can notice that there are some preloaded settings in this section. What we have done is we have optimized these settings to the maximum so that they make sense and convert the best for you, if you wish to change them you can or you can leave them as they are.
To know about the advanced settings in the campaign, click here.
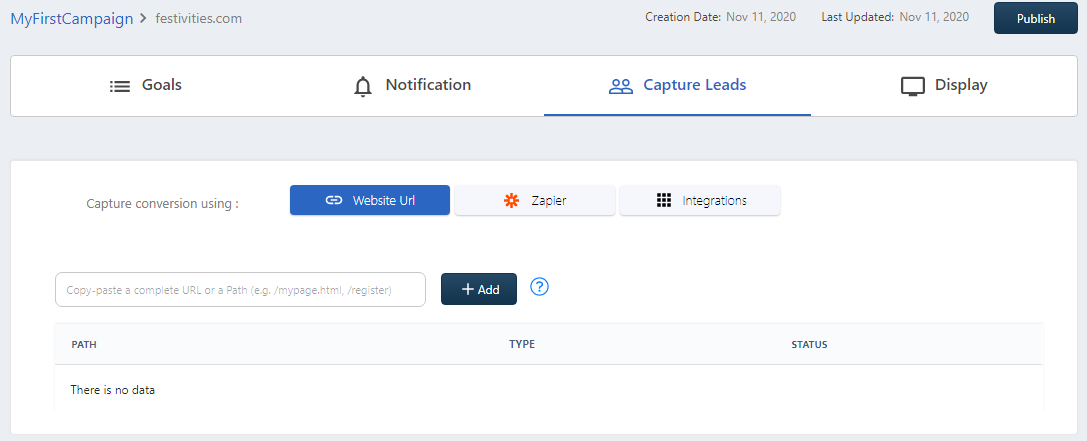
3. Capture Leads:
Capture leads is where you want to enter the details of the place where you have a form on your website or the place from where you want us to pick details and show it to your customers in the form of Bulk, Recent and Review Notifications.
So you don't have to add the full website name, you just have to add the path URL and then it will pick things on its own and click on the add area.
You can use 3 methods to capture leads:
a) Website URL
b) Zapier
c) Integrations & Webhooks
4. Display:
This is the area where you decide where you want to display your notifications, you can either run it on all pages, specific pages or even run on a sub-domain.
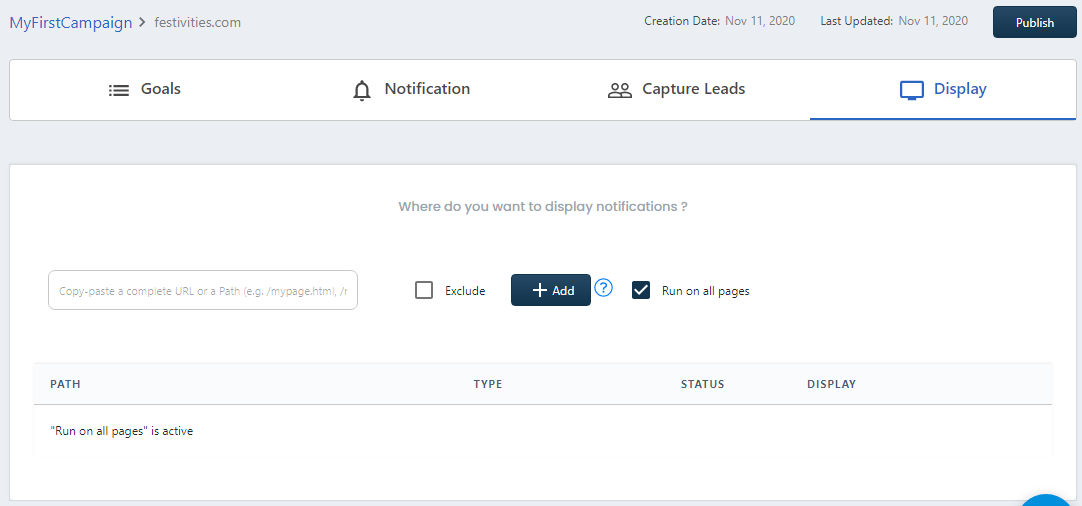
And once you are done, with this you need to go in the footer area and click on the Publish Button (in the top-right hand corner) to make your campaign go live.
You can click here on the third step to find out how to check whether your notifications are running or not.
If you're still facing any issues, then you can contact us through the support section, & we'd be more than happy to assist you with it.