
Step 1: Installing your Influence Pixel
To get started with your Influence account, you need to install the pixel properly on your websites.
The first step in running notifications is to install your Influence Pixel. Pixel installation & verification is a 2-minute task & can be done easily by following the below-mentioned steps.
Pixel Installation can be done by a bunch of methods, let's have a look at a few of them, and you can choose as per your website's platform.
Go to your Influence Dashboard & open the pixel Installation area.
Method 1. Installing directly inside your Website's Head Tag Area.
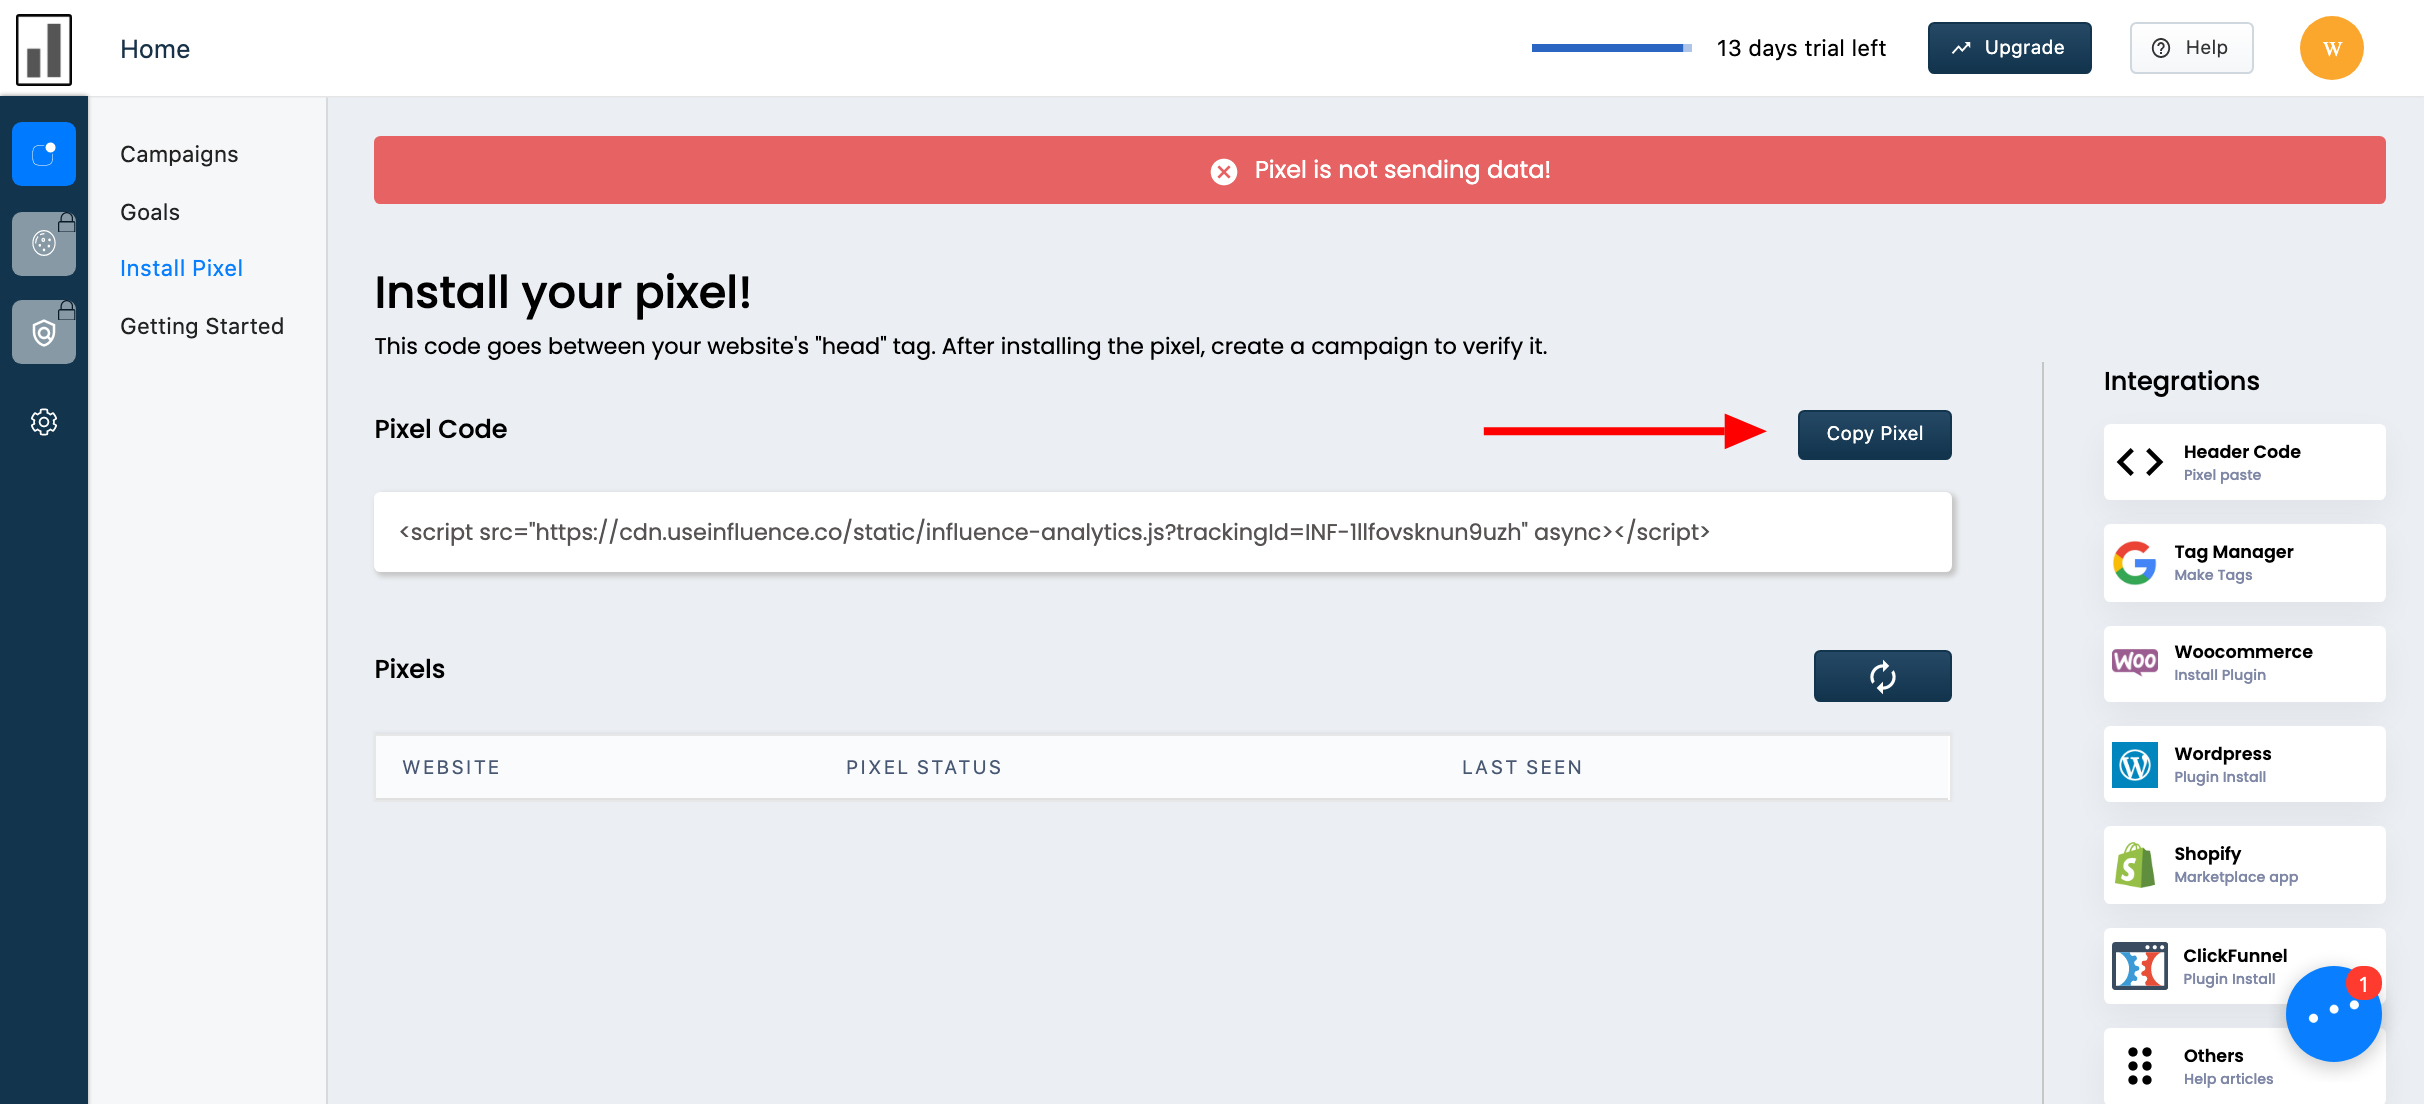
Step 1. Copy your unique pixel code.
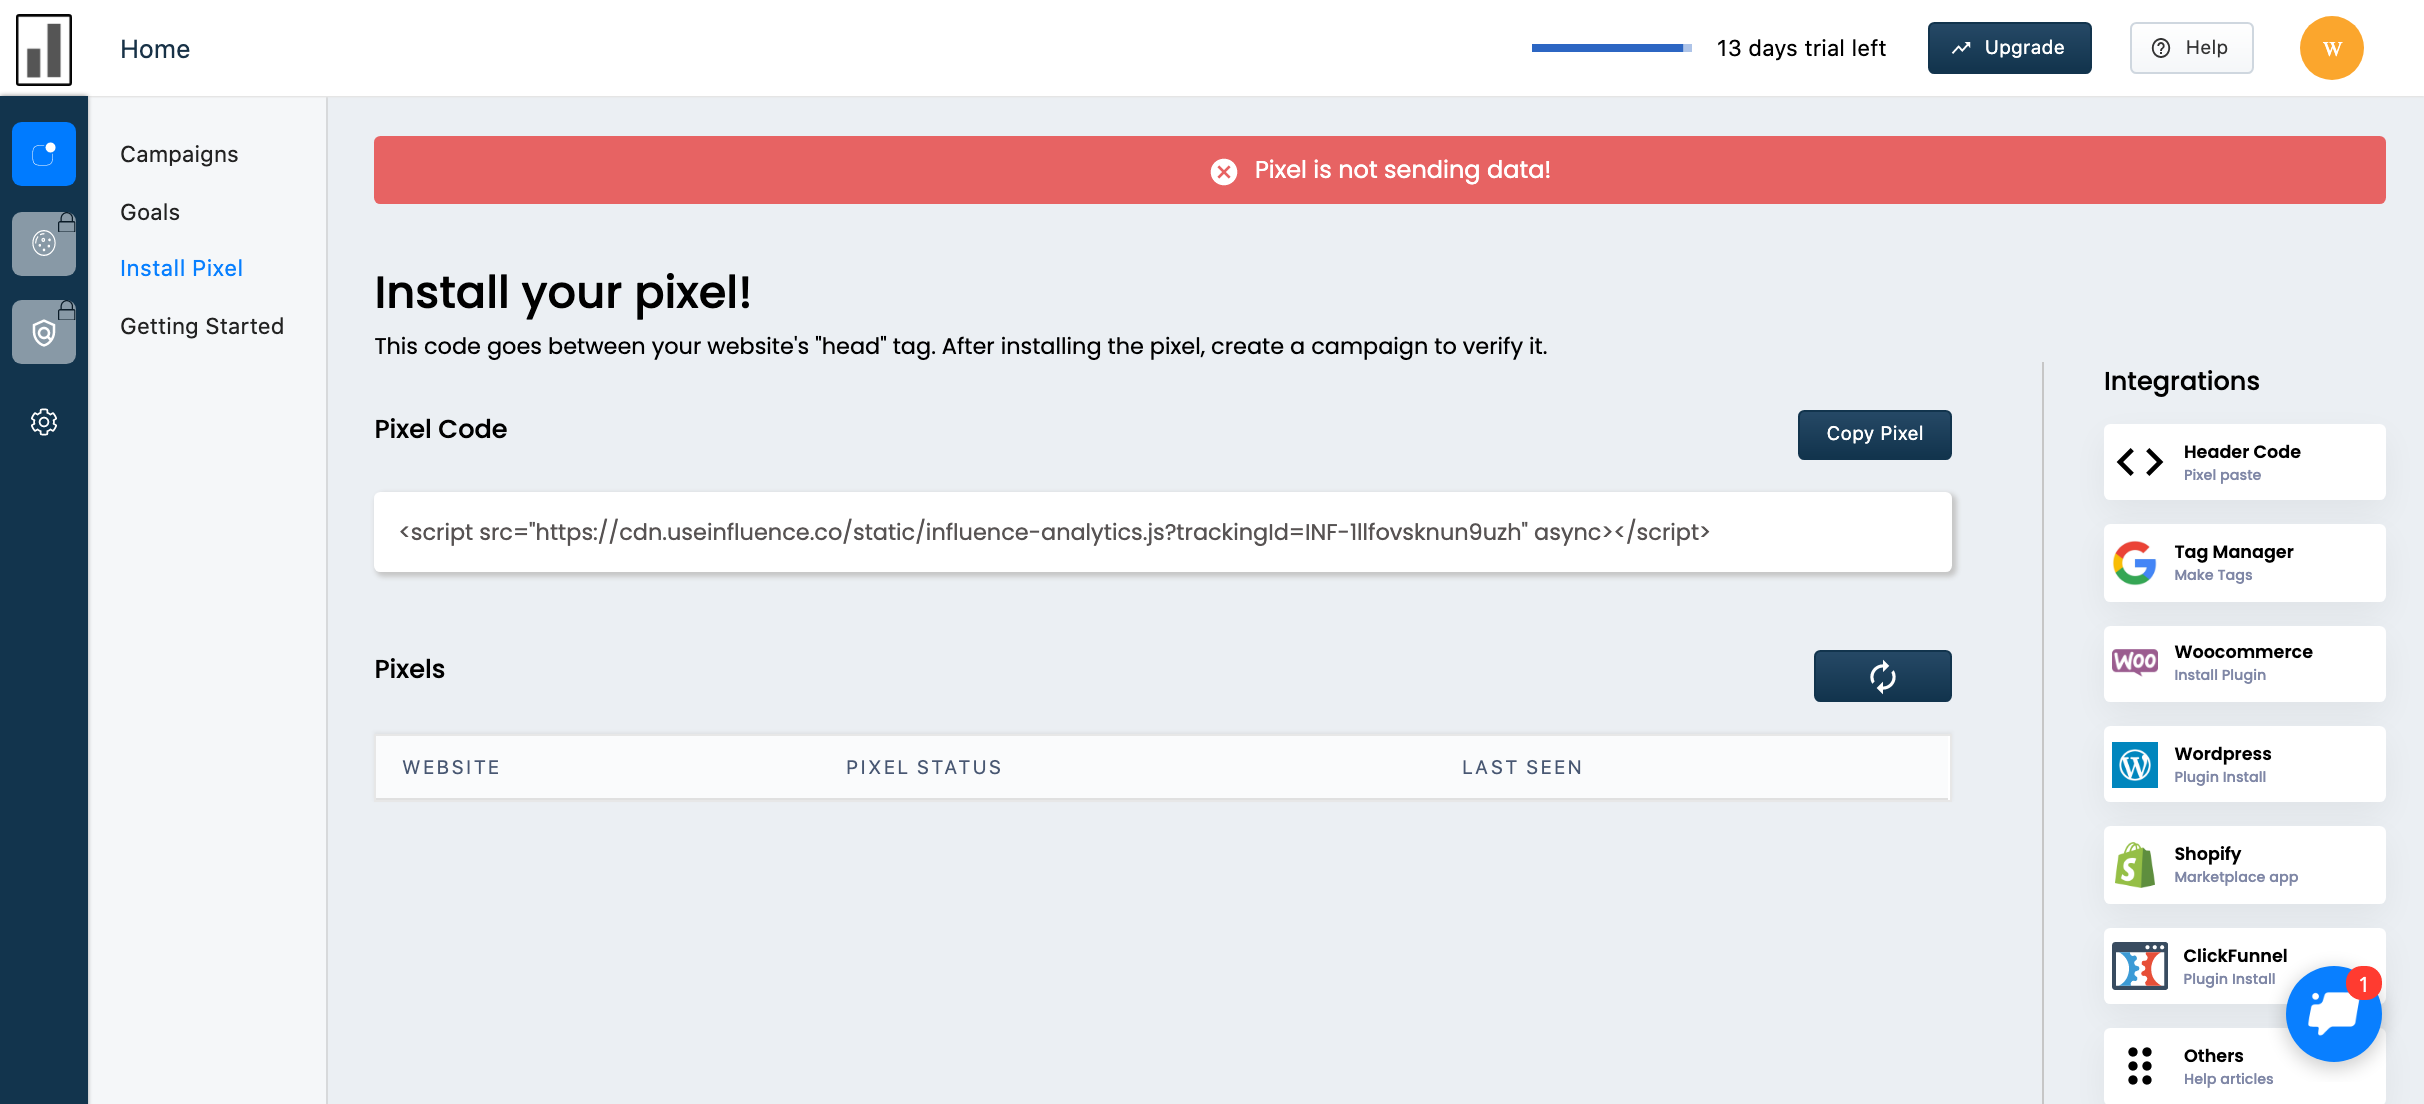
Once you have signed up, you will land on a page that looks like this.
Copy the Pixel from the dashboard by clicking on the Copy Pixel button as shown below:
Step 2. Add Pixel to your website header.
Now paste that code between the <head> tag of your website, and save it.
Step 3. Make Sure That Your Pixel Is Verified.
Once you have installed the pixel correctly and saved it on your website, you need to ensure that the Pixel is showing up as verified or not.
Click here to learn how to get your pixel verified.
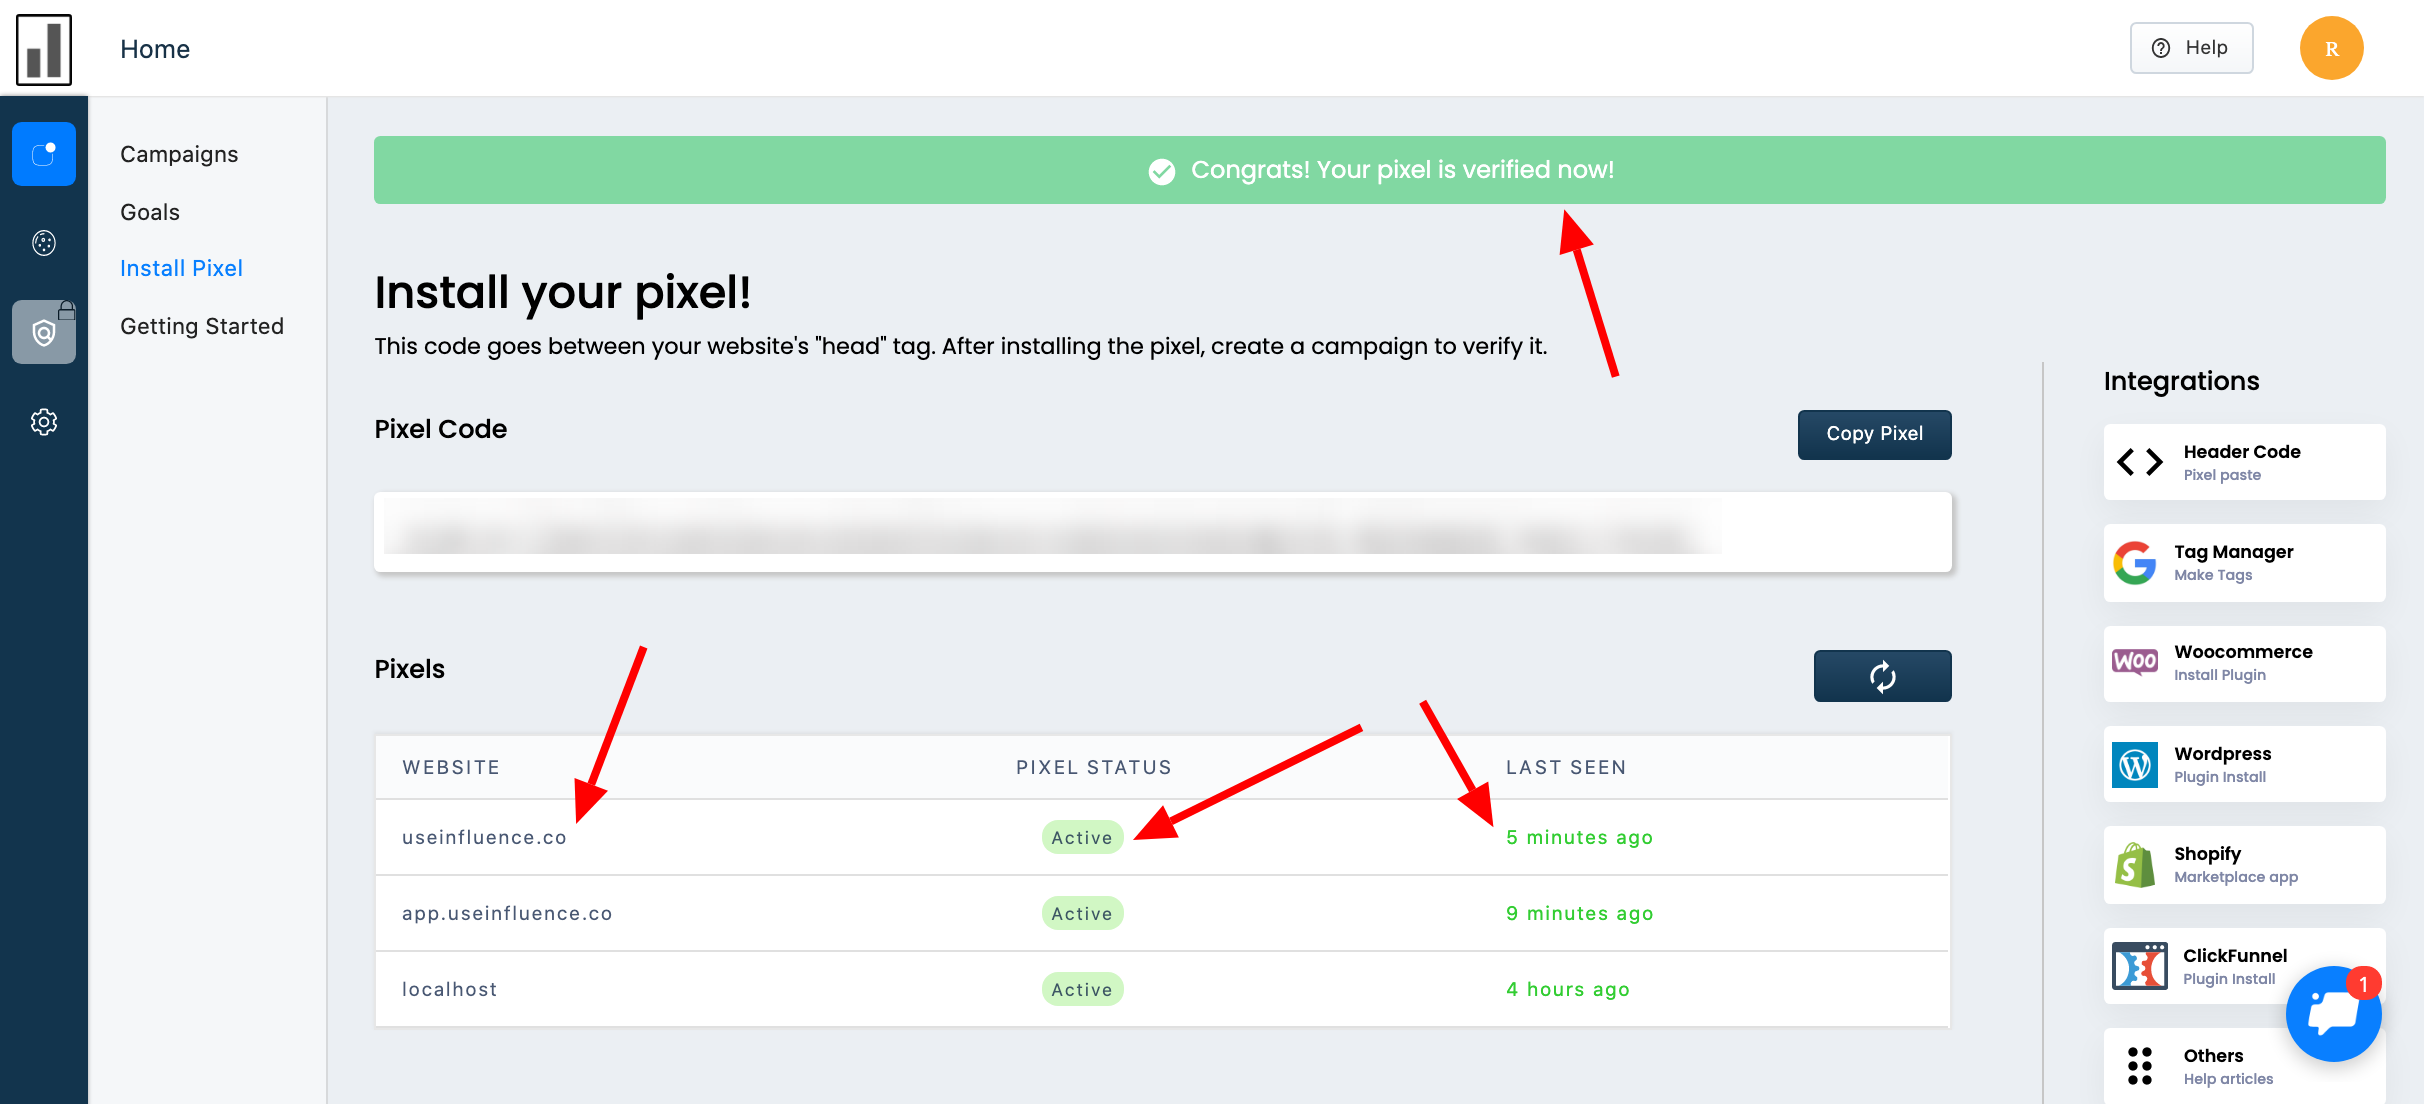
You'll be able to see your website name, active status and the last when the pixel was seen on your website.
If the bar shows verified then it means that the pixel has been verified properly.
Once the pixel is verified then you can move on to the next process, which is to create your campaign for the website.
Click here to learn more about creating a campaign
Other Methods :
If you are not using a simple HTML website and are using type of websites, or landing pages or any other page please check out the following articles.
Click here to install your Pixel using Google Tag Manager
Click here to install your Pixel using WordPress
Click here to install your Pixel using WooCommerce
Click here to install your Pixel using Shopify
Click here to install your Pixel using Magento
Click here to install your Pixel using OpenCart
Click here to install your Pixel using ClickFunnels
Click here to install your Pixel using Joomla
Click here to install your Pixel using Podia
Click here to install your Pixel using Thinkific
Click here to install your Pixel using Teachable
Click here to install your Pixel using Webflow
Click here to install your Pixel using Landingi
Click here to install your Pixel using InstaPage
Click here to install your Pixel using Demio
Click here to install your Pixel using Ontraport
Click here to install your Pixel using Mailmunch
Click here to install your Pixel using Kartra
Click here to install your Pixel using Hubspot
Click here to install your Pixel using Leadpages
Click here to install your Pixek using Squarespace
Click here to install your Pixel using Wix
Click here to install your Pixel using Unbounce
If you're still facing any issues, then you can contact us through the support section, & we'd be more than happy to assist you with it.