Integrating with Wordpress
It will take you just a few minutes to install, and to sync your Wordpress website with Influence.
Install Insert header and footer plugin.
Since the pixel needs to be pasted in the header area of WordPress, for that you need to download the plugin.
Go to your WordPress account, on the left section click on the plugins area and then click on Add New.
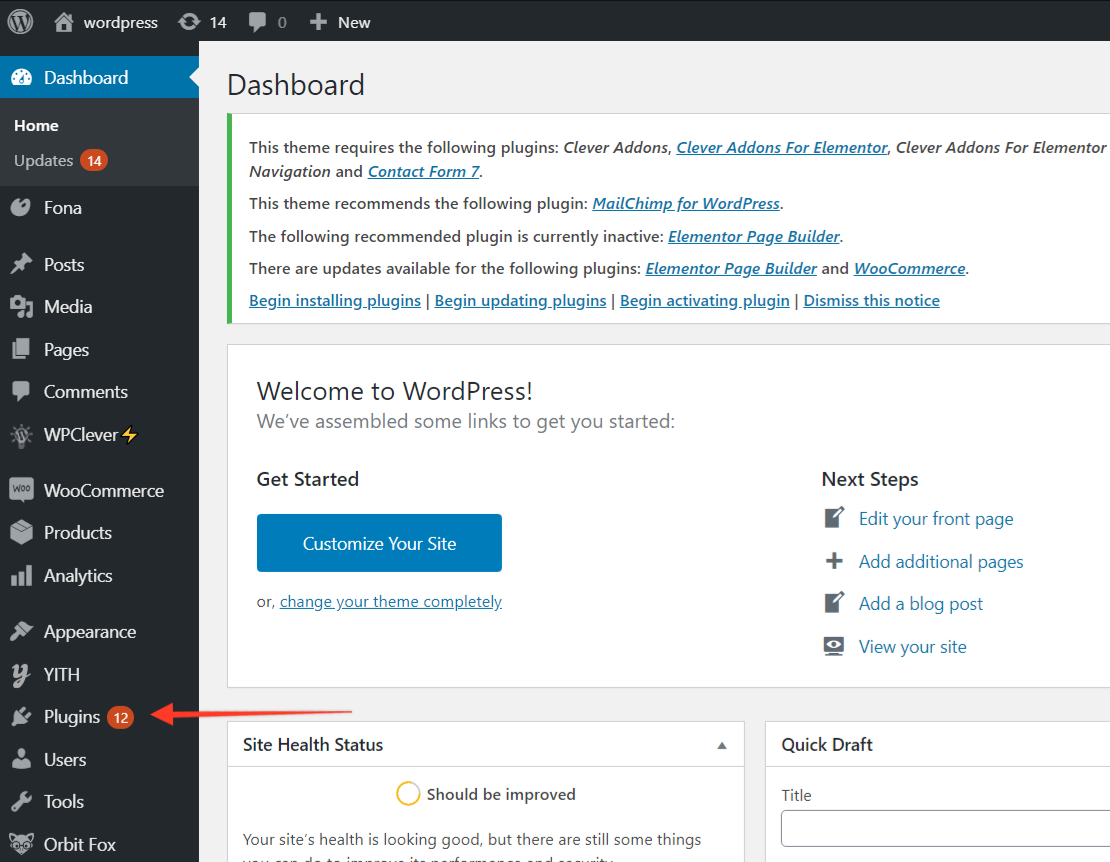
You'll see an Insert Headers and Footers plugin. You can even download the plugin by clicking here.
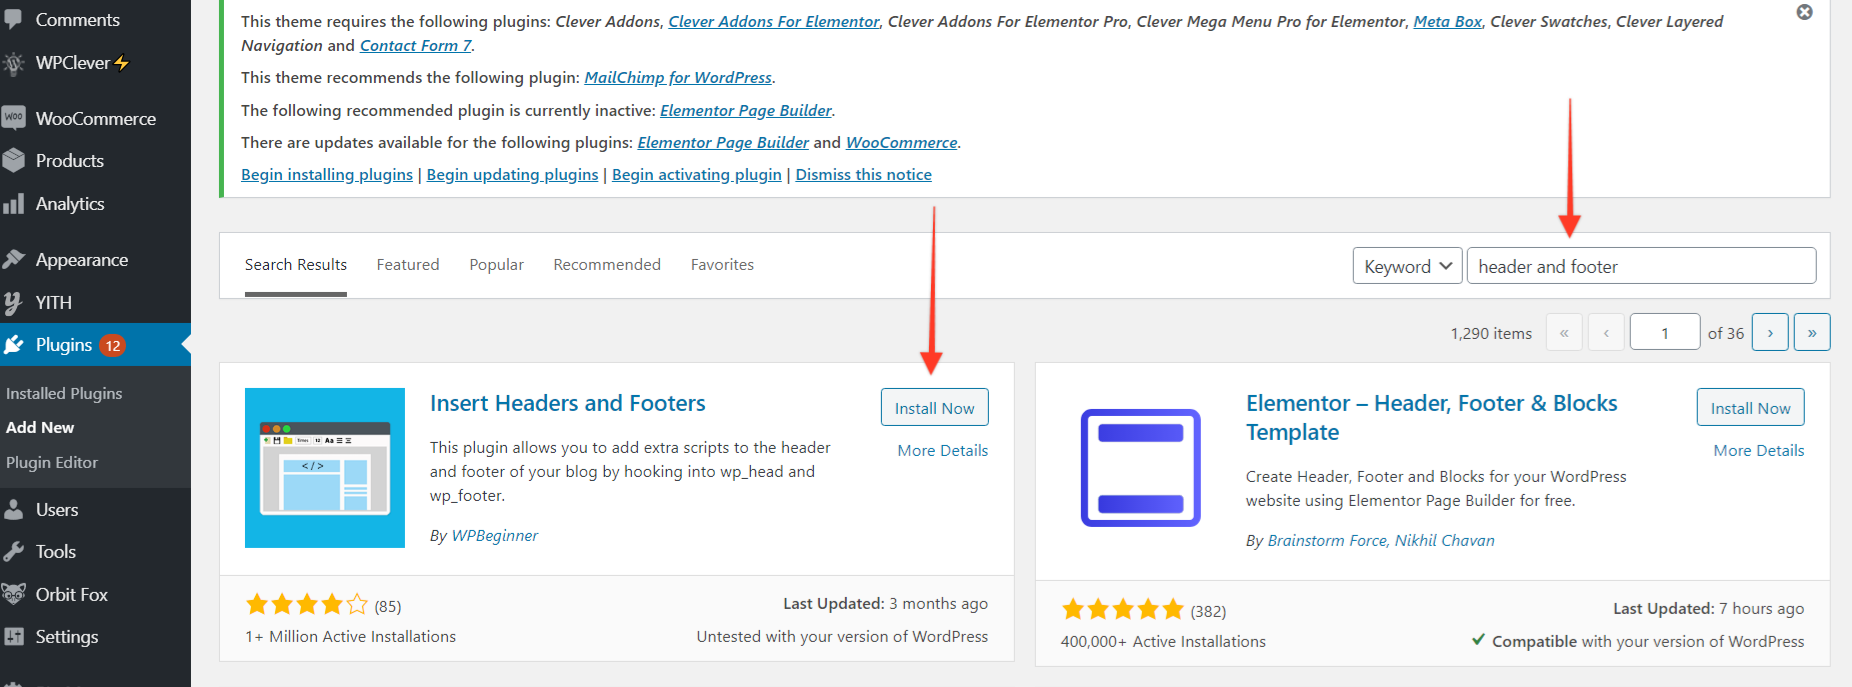
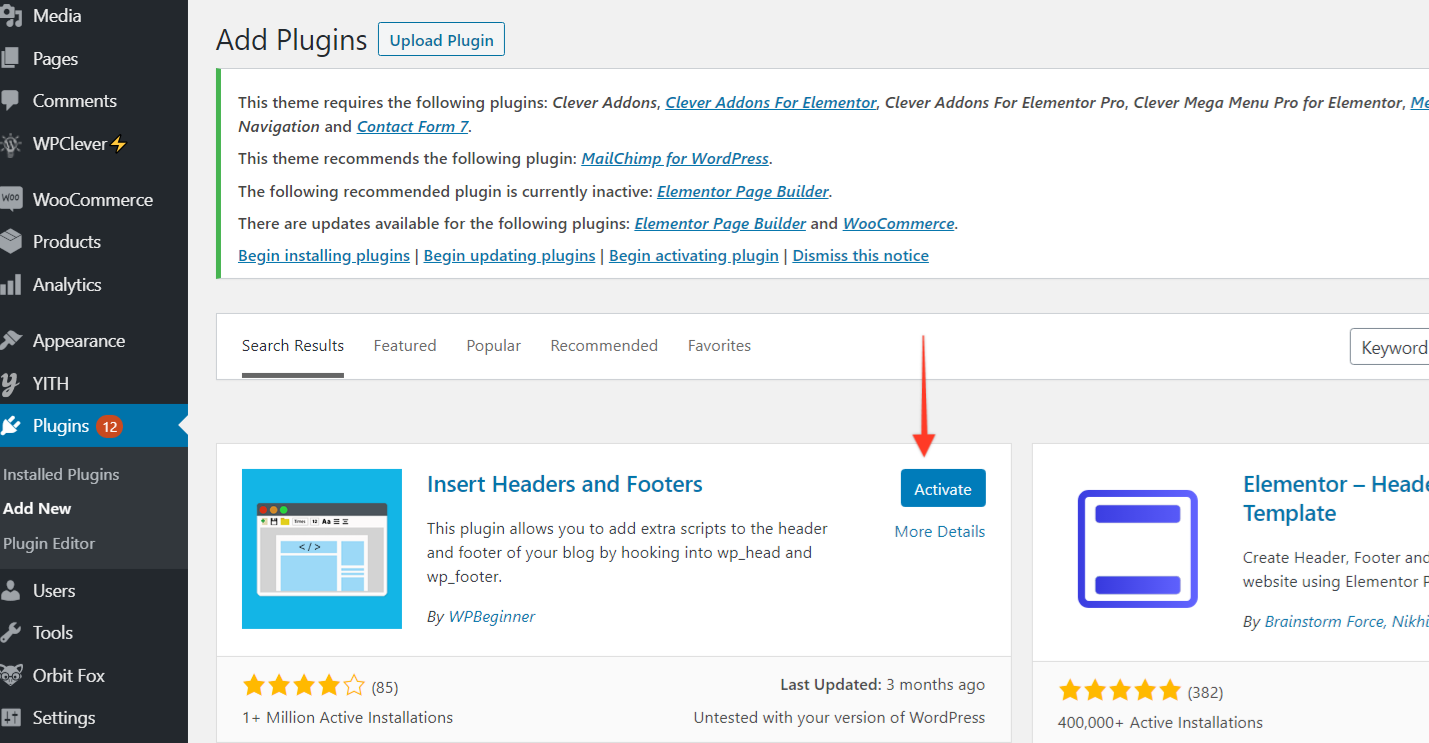
Once you are done and installed with it, you need to activate the plugin.
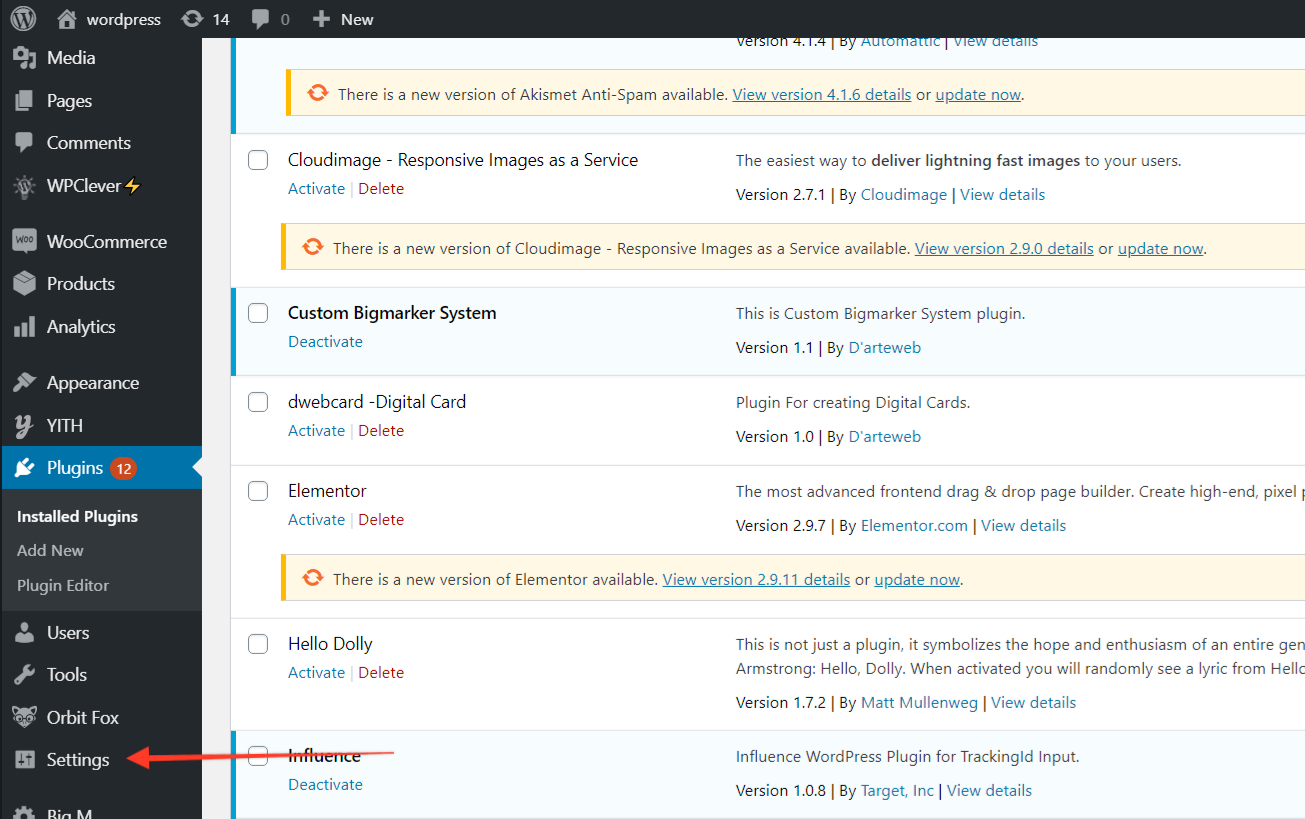
Once the plugin is activated, then you need to go to the settings area of the click on the header and footer plugin option.
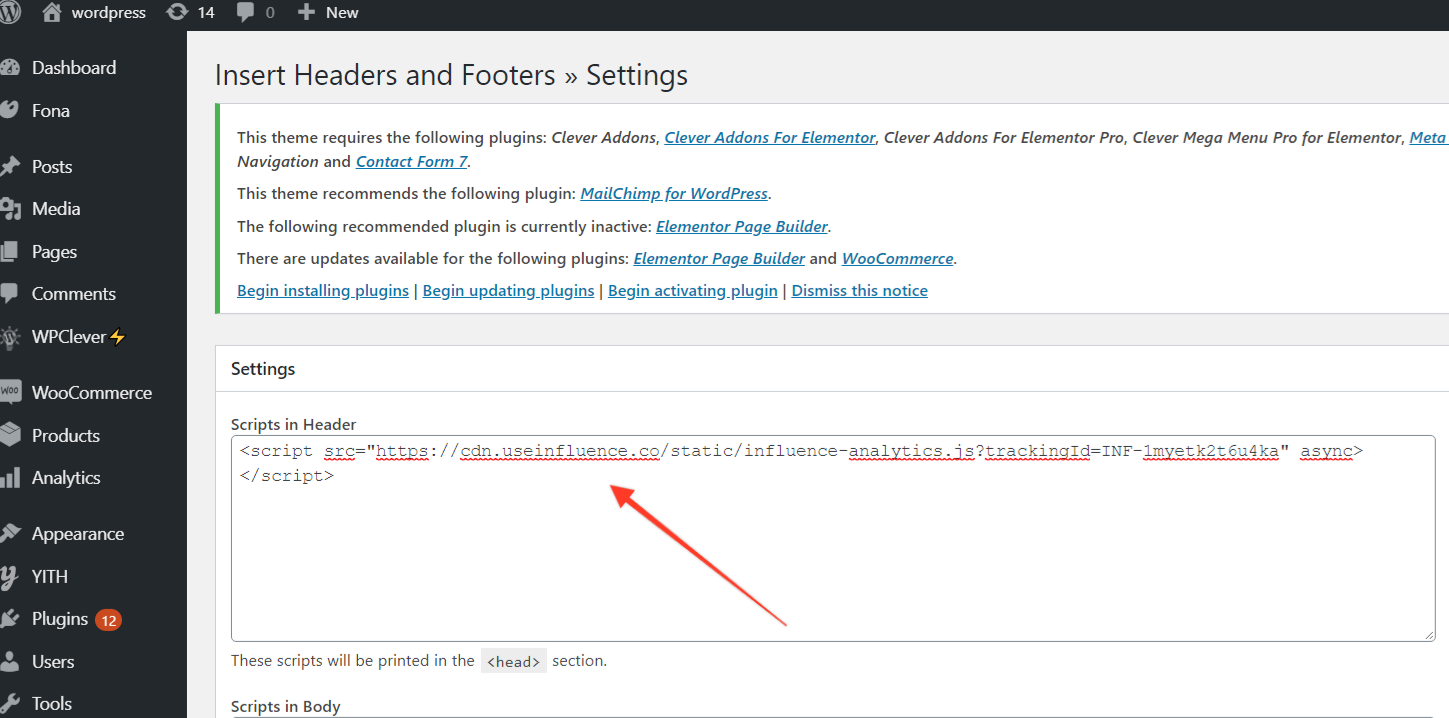
You'll land up on a place like this, and you need to enter your Influence pixel in this empty header area and then press save to load it up. If there is any other Pixel like the facebook pixel, you can paste it after that also.
Before you move forward also learn how to verify your influence pixel.
Now you are all set & done!
Go back to your Influence dashboard & start making a New Campaign.
If you're using WordPress method there are few things that may cause a problem in getting the pixel to be verified.
Usually, WordPress is slow to verify the pixel because of the platform's nature.
Some of the common thing that you can do to make it work.
- If you've installed Influence plugin and are making things work with that, then try to delete it and install as mentioned above.
- Install a super cache plugin, and activate it. (Keep the plugin count close to 12 plugins, a lot of times multiple plugins also conflict with the functioning of our plugin as well)
- Refresh the browser, and open it in 3-4 windows and then refresh all of them, you'd be able to see the pixel turn green & if the campaign is being made, you'll see the popups as well.
- If you're using Elementor For WordPress: it would take you a little longer than usual.
- If you're connecting your WordPress through Google Tag Manager: it would also take a little longer than usual.
- If you are using any theme based installation, our advice would be to refrain from such methods and install it through the header footer as mentioned above.
You can even learn how to install the Pixel on your WordPress website by checking out our video tutorial mentioned below:
If you're still facing any issues, then you can contact us through the support section, & we'd be more than happy to assist you with it.
