
Integrating with WooCommerce
Influence can be connected to a WooCommerce store in two ways, as mentioned below:
Installation method A - Wordpress Plugin Install
Installation method B - Direct Pixel Install along with WebHook connection
Lets get started with the steps you need to follow to successfully complete the installation.
Installation Method A: Wordpress Plugin Install
Installing Influence Plugin on your WooCommerce store is a 2 minute task.
Follow these simple steps & get it done quickly!
{Important Note: Please only use Influence WP Plugin for WooCommerce to run perfectly. Other methods like direct Pixel install or GTM will not work properly}
Search for Useinfluence Plugin inside your Wordpress dashboard's Add Plugins screen, Or Go to Influence Plugin Page (on Wordpress marketplace).
Step 1. Click on Install Now button on the plugin card, as shown in below picture.
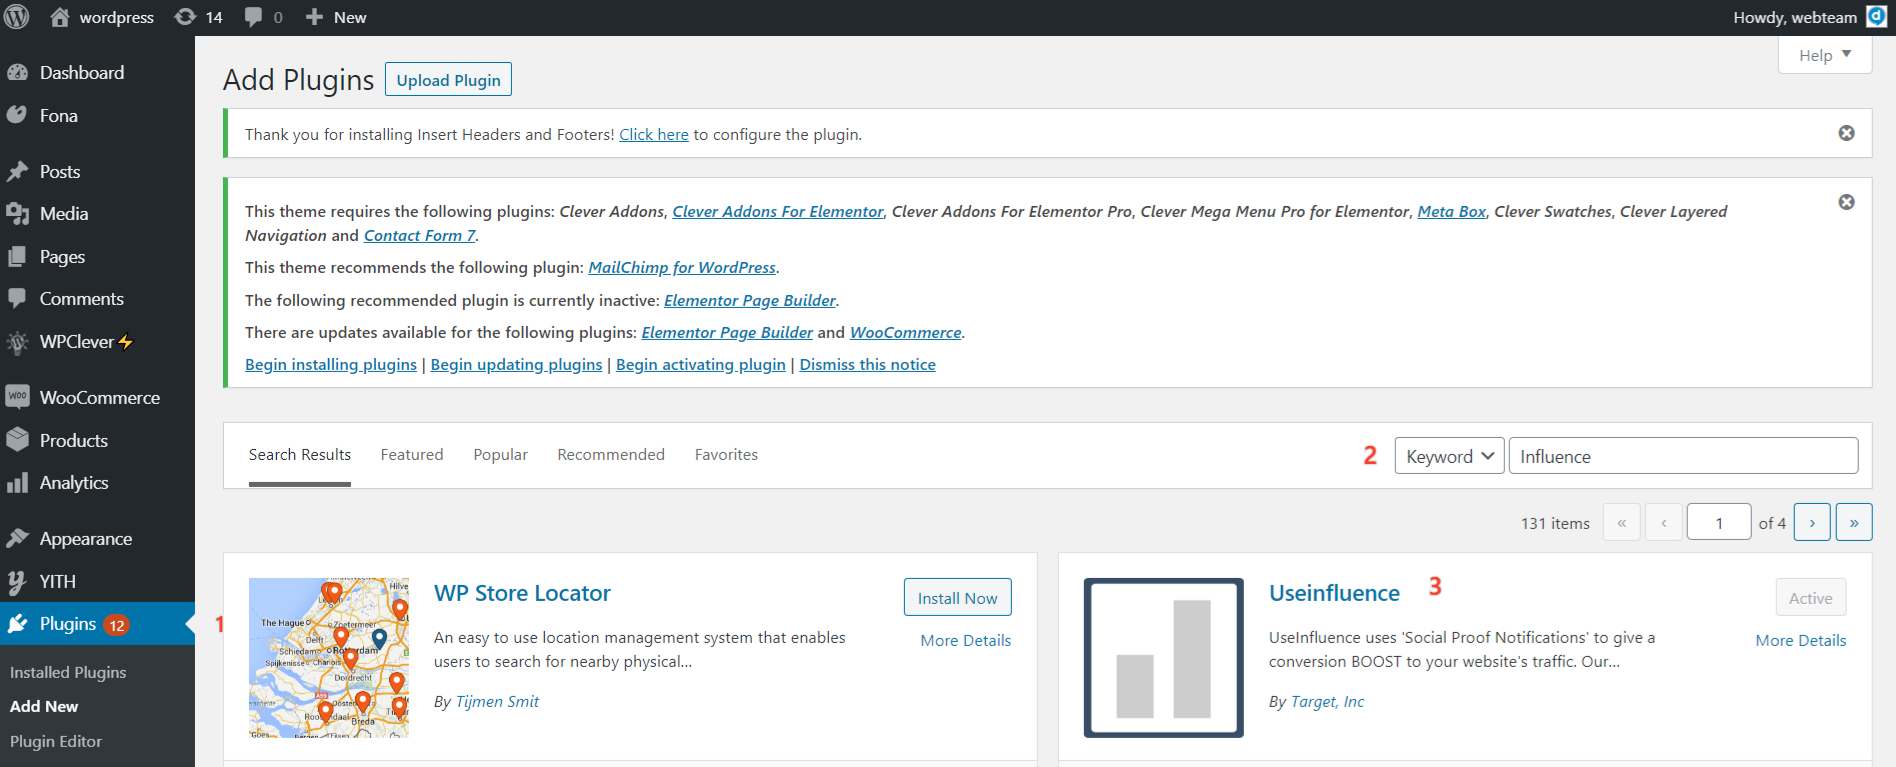
Step 2. After successful installation, go to your Plugins directory & activate the plugin.
You will be redirected to the below screen where you have to enter your credentials.
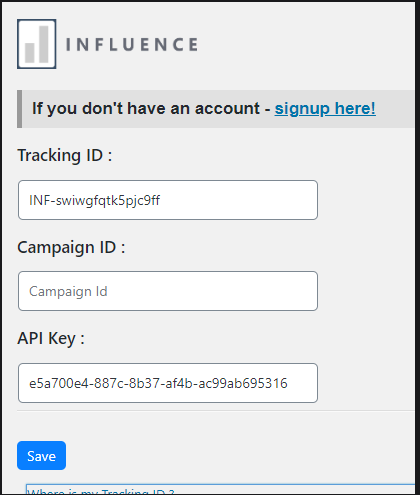
You can get your account credentials inside your Influence dashboard.
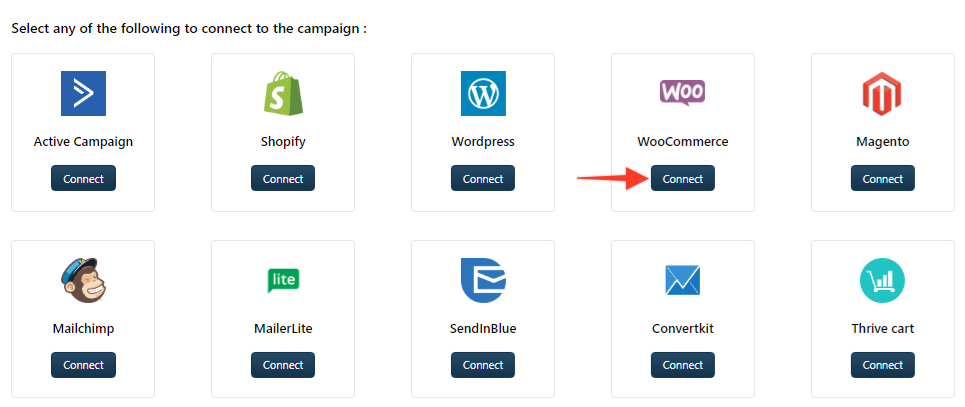
Go the Capture leads >> Integration Section and click on the Connect button of the WooCommerce Card.
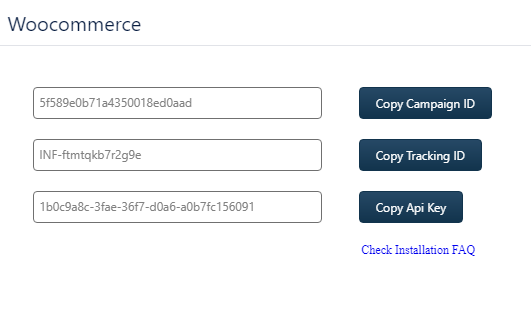
The following window will open showing you your account credentials.
 Step 3. Once you have inserted your credentials, Click on Save button to finish the authentication process.
Once the Plugin is installed successfully, you can go back to your Influence dashboard and start creating a New Campaign.
{Note: While creating a new campaign for WooCommerce, insert your exact Domain URL on the campaign info page.}
If you're still facing any issues, then you can contact us through the support section, & we'd be more than happy to assist you with it.
Installation method B: Direct Pixel Install along with WebHook connection
Step 1 - Copy your unique Pixel code
Copy the pixel from your Influence dashboard & Install that Pixel inside the <head> tag section of your website.
You'll have to follow the same process as install it on any other normal WordPress website.
To learn how to paste the pixel in a WordPress website.
Click here to learn more
Step 2 - Create your campaign.
Create your campaign & keep the settings as it is and move straight to the the capture leads section, generate a "Custom Webhook", & copy the Webhook endpoint.
Click here to learn more about how to create a custom webhook.
Step 3 - Install that Webhook endpoint inside Woocommerce admin panel.
First go to the WebHooks section of the WooCommerce as shown in the below image:
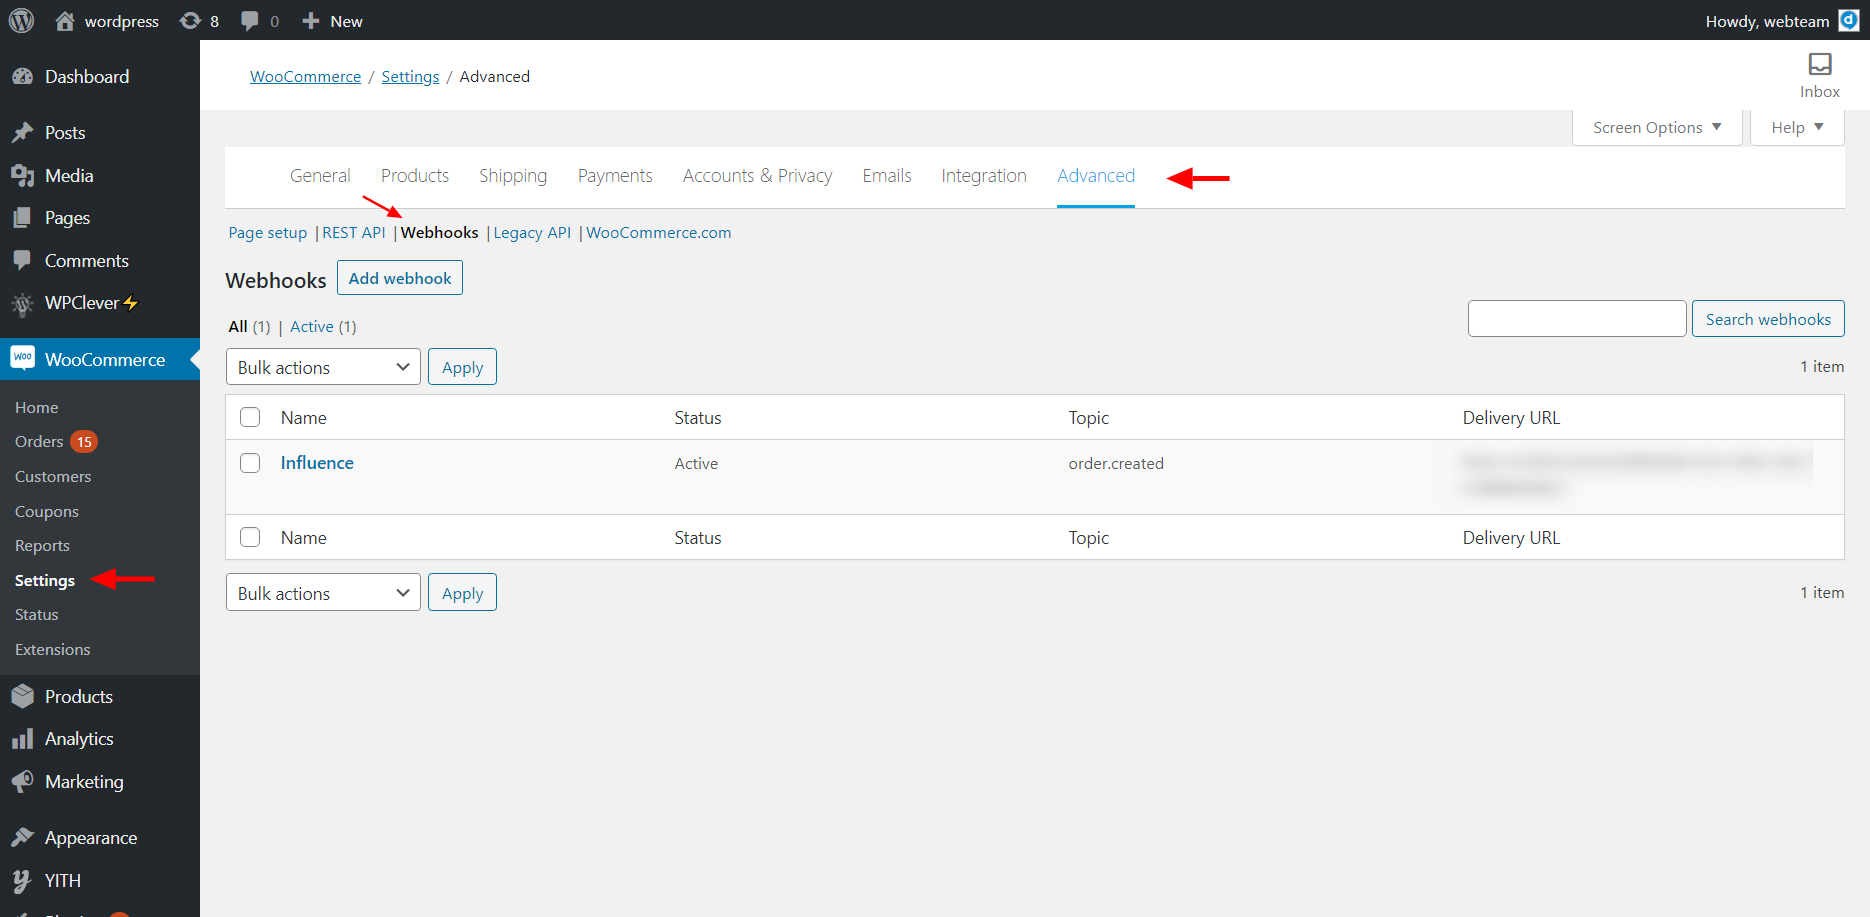
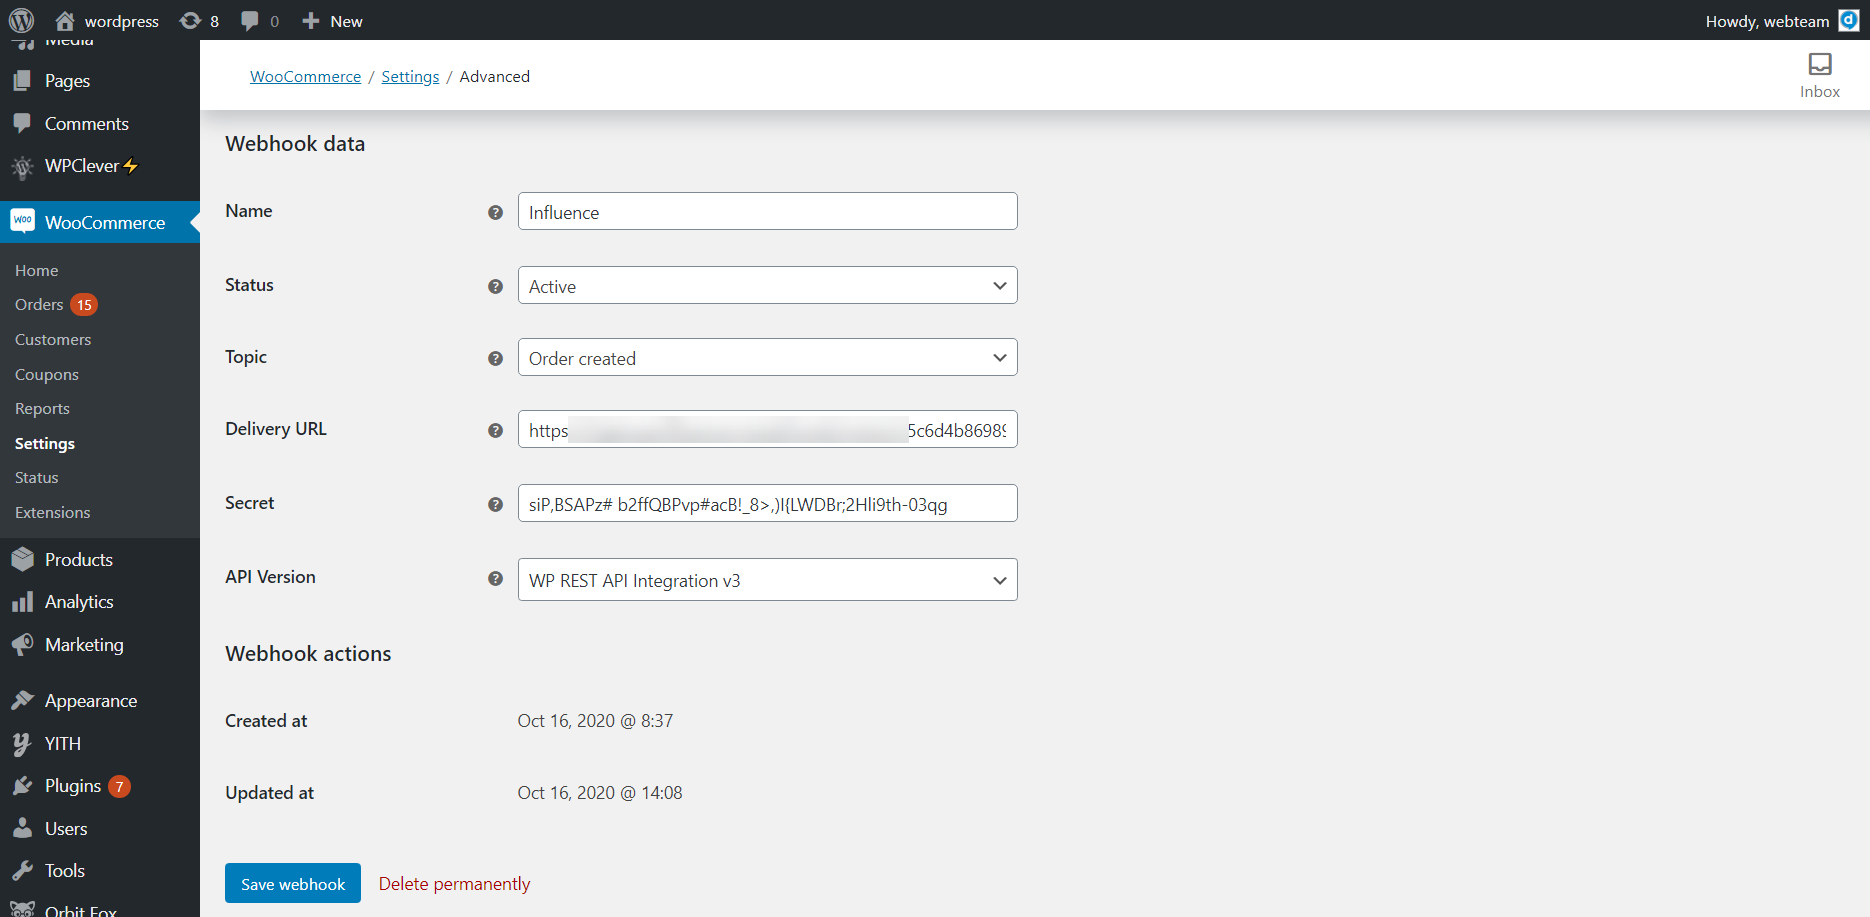
After clicking on the Webhooks link below screen will open up. Please fill up the fields as per below mentioned guidelines:
- Name - name your WebHook as Influence
- Status - should be Active
- Topic - select topic as Order.created
- Delivery URL - Paste your webhook endpoint here
- Secret - this should be auto-generated & you don't need to edit it or put anything here
- API version - Set it as "WP REST API Integration v3"
Finally, click on Save Webhook button to complete the connection process.
Do some test order to check the data flow into your campaign.
{Note: Ordered product information cannot be sent using this Method A}